# filename :
digital_makeup.py
# -*- coding: utf-8 -*-
# 导入pil模块 ,可用命令安装 apt-get install python-Imaging
from PIL import Image, ImageDraw
# 导入face_recogntion模块,可用命令安装 pip install face_recognition
import face_recognition
#将jpg文件加载到numpy数组中
image = face_recognition.load_image_file("biden.jpg")
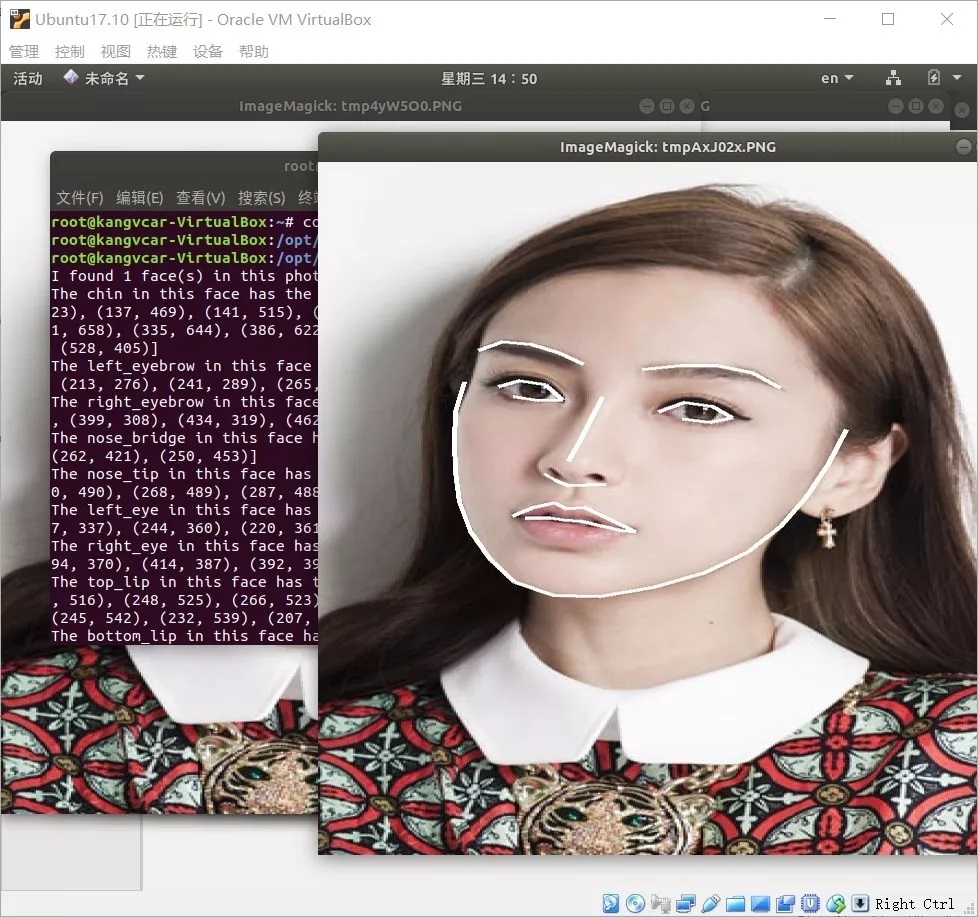
#查找图像中所有面部的所有面部特征
face_landmarks_list = face_recognition.face_landmarks(image)
for face_landmarks in face_landmarks_list:
pil_image = Image.fromarray(image)
d = ImageDraw.Draw(pil_image, 'RGBA')
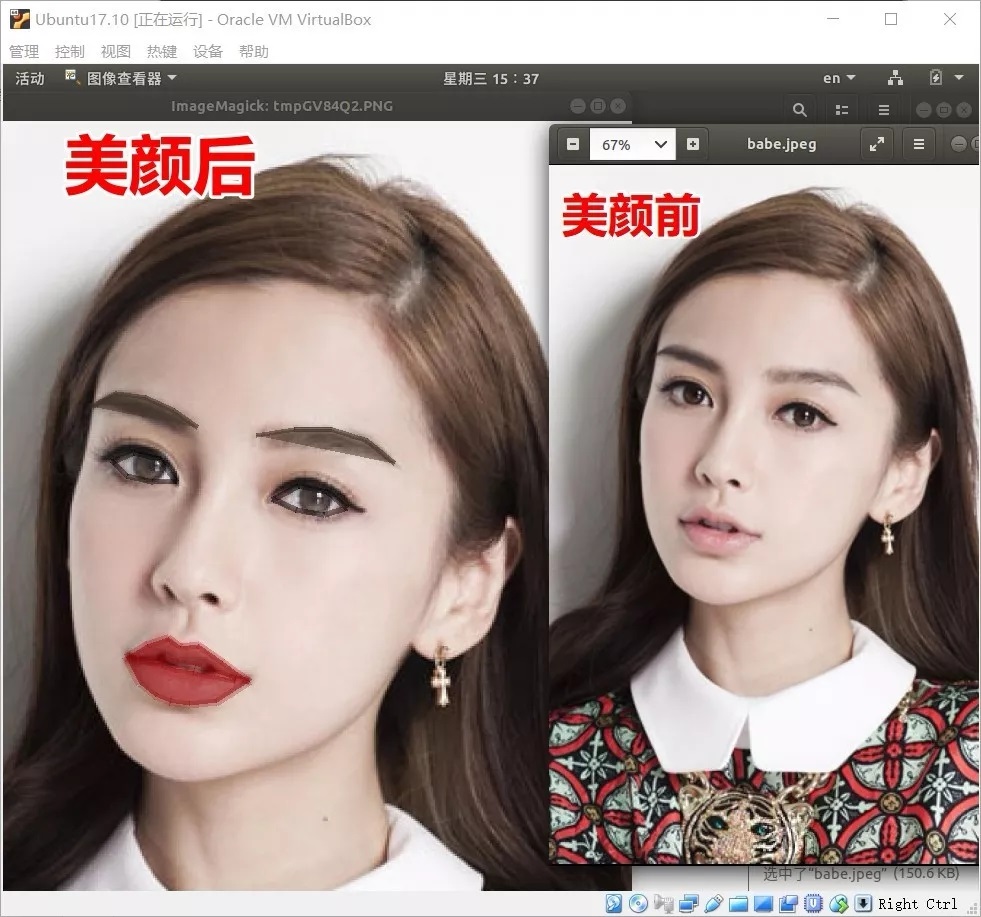
#让眉毛变成了一场噩梦
d.polygon(face_landmarks['left_eyebrow'], fill=(68,
54, 39, 128))
d.polygon(face_landmarks['right_eyebrow'], fill=(68,
54, 39, 128))
d.line(face_landmarks['left_eyebrow'], fill=(68,
54, 39, 150), width=5)
d.line(face_landmarks['right_eyebrow'], fill=(68,
54, 39, 150), width=5)
#光泽的嘴唇
d.polygon(face_landmarks['top_lip'], fill=(150,
0, 0, 128))
d.polygon(face_landmarks['bottom_lip'], fill=(150,
0, 0, 128))
d.line(face_landmarks['top_lip'], fill=(150,
0, 0, 64), width=8)
d.line(face_landmarks['bottom_lip'], fill=(150,
0, 0, 64), width=8)
#闪耀眼睛
d.polygon(face_landmarks['left_eye'], fill=(255,
255, 255, 30))
d.polygon(face_landmarks['right_eye'], fill=(255,
255, 255, 30))
#涂一些眼线
d.line(face_landmarks['left_eye'] + [face_landmarks['left_eye'][0]],
fill=(0, 0, 0, 110), width=6)
d.line(face_landmarks['right_eye'] + [face_landmarks['right_eye'][0]],
fill=(0, 0, 0, 110), width=6)
pil_image.show() |