| 今天有点空余时间,在看Windows
Phone 7的开发。看到Silverlight for phone和XNA 4.0的开发文章已经有了不少,而且质量很高。我就来说说XNA
4.0的3D开发这个领域吧,正好跟目前的工作有些关系,而且XNA 4.0的3D类库设计的非常好,比iPhone和Android的OpenGLES类库高出一个档次。以后学习3D开发,用XNA类库也是个不错的选择,而且Windows
Phone模拟器对3D的支持也非常好。唯一的遗憾是,Windows Phone不支持C++的3D开发。
如果做过Zune上XNA 3.1开发的朋友可能会记得,在XNA 3.1中是不支持3D开发的,XNA 4.0中加入的3D支持类,主要包含在Microsoft.Xna.Framework.Graphics命名空间中。如果XNA
4.0中的3D概念与OpenGLES十分相似,我们可以找到很多相对应的函数、方法等,某种意义上,XNA
4.0的3D支持是对OpenGLES 2.0的封装。
一.一个简单的3D程序
我们就从一个简单的3D程序开始吧,这个程序的原来介绍在下面这个链接里。
http://msdn.microsoft.com/en-us/library/bb203926.aspx
不过移植到Windows Phone 7上时,还是遇到了一些小问题,有的是文档的问题,有的是接口变化。如何在Visual
Studio 2010里创建XNA 4.0的工程就不多说了,大家可以参考我写的《Windows Phone开发工具初体验》,链接如下:
http://www.cnblogs.com/aawolf/archive/2010/08/28/1811438.html
XNA 4.0的程序是派生自Microsoft.Xna.Framework.Game的类,开发者需要重载Game的四个方法:Initialize(初始化)、LoadContent(加载内容)、UnloadContent(卸载内容)、Update(更新)和Draw(绘制)等方法。
首先,我们在Game1类中加入所需要的一些私有变量:
Matrix worldMatrix;

Matrix viewMatrix;

Matrix projectionMatrix;

VertexPositionNormalTexture[] cubeVertices;

VertexDeclaration vertexDeclaration;

VertexBuffer vertexBuffer;

BasicEffect basicEffect;
|
Martrix 的中文名叫“矩阵”,还有个翻译叫“黑客帝国”……扯远了,什么是矩阵?我们就不解释了,只要知道矩阵是一切3D线性变化的基础就可以了。我们不知道矩阵是什么,却身处其中。在Game1类中用了三个矩阵:worldMatrix用来描述世界坐标系;viewMatrix用来描述摄影机坐标系;projectionMatrix用来描述投影坐标系。这些都是3D图形学的概念,不解释了。
另外两个重要的变量是vertexBuffer和basicEffect。vertexBuffer包含了一系列的向量,这些向量构成了我们要显示的正方体的各个顶点;basicEffect用来描述一个基础的渲染效果,其中描述了坐标系、颜色和灯光等基本的要素,这些要素是3D图形显示的基础。
接下来创建一个叫InitMatrices的方法,对各个坐标系进行初始化,记得,这个InitMatrices的函数是我们自己创建的,代码如下:
private void InitMatrices()

{

// Initialize the world, view, and projection matrices.

float tilt = MathHelper.ToRadians(0); // 0 degree angle

// Use the world matrix to tilt the cube along x and y axes.

worldMatrix = Matrix.CreateRotationX(tilt) * Matrix.CreateRotationY(tilt);

viewMatrix = Matrix.CreateLookAt(new Vector3(5, 5, 5), Vector3.Zero, Vector3.Up);

projectionMatrix = Matrix.CreatePerspectiveFieldOfView(

MathHelper.ToRadians(45), // 45 degree angle

(float)GraphicsDevice.Viewport.Width /

(float)GraphicsDevice.Viewport.Height,

1.0f, 100.0f);

}
|
算了,不解释了,大家知道这段代码在干什么就好了。接下来,创建一个叫做InitEffect的函数中,对basicEffect进行初始化,代码如下:
private void InitEffect()

{

// Initialize BasicEffect with transformation and light values

basicEffect = new BasicEffect(graphics.GraphicsDevice);

basicEffect.World = worldMatrix;

basicEffect.View = viewMatrix;

basicEffect.Projection = projectionMatrix;

// primitive color

basicEffect.AmbientLightColor = new Vector3(0.1f, 0.1f, 0.1f);

basicEffect.DiffuseColor = new Vector3(1.0f, 1.0f, 1.0f);

basicEffect.SpecularColor = new Vector3(0.25f, 0.25f, 0.25f);

basicEffect.SpecularPower = 5.0f;

basicEffect.Alpha = 1.0f;

basicEffect.LightingEnabled = true;

if (basicEffect.LightingEnabled)

{

basicEffect.DirectionalLight0.Enabled = true; // enable each light individually

if (basicEffect.DirectionalLight0.Enabled)

{

// x direction

basicEffect.DirectionalLight0.DiffuseColor = new Vector3(1, 0, 0); // range is 0 to 1

basicEffect.DirectionalLight0.Direction = Vector3.Normalize(new Vector3(-1, 0, 0));

// points from the light to the origin of the scene

basicEffect.DirectionalLight0.SpecularColor = Vector3.One;

}

basicEffect.DirectionalLight1.Enabled = true;

if (basicEffect.DirectionalLight1.Enabled)

{

// y direction

basicEffect.DirectionalLight1.DiffuseColor = new Vector3(0, 0.75f, 0);

basicEffect.DirectionalLight1.Direction = Vector3.Normalize(new Vector3(0, -1, 0));

basicEffect.DirectionalLight1.SpecularColor = Vector3.One;

}

basicEffect.DirectionalLight2.Enabled = true;

if (basicEffect.DirectionalLight2.Enabled)

{

// z direction

basicEffect.DirectionalLight2.DiffuseColor = new Vector3(0, 0, 0.5f);

basicEffect.DirectionalLight2.Direction = Vector3.Normalize(new Vector3(0, 0, -1));

basicEffect.DirectionalLight2.SpecularColor = Vector3.One;

}

}

}
|
然后要对vertexDeclaration、cubeVertices和vertexBuffer变量进行初始化,我们将这部分代码放在InitVertexBuffer函数中:
private void InitVertexBuffer()

{

// Create a vertex declaration for the type VertexPositionNormalTexture

vertexDeclaration = new VertexDeclaration(new VertexElement[]

{

new VertexElement(0, VertexElementFormat.Vector3, VertexElementUsage.Position, 0),

new VertexElement(12, VertexElementFormat.Vector3, VertexElementUsage.Normal, 0),

new VertexElement(24, VertexElementFormat.Vector2, VertexElementUsage.TextureCoordinate, 0)

}

);

// Create the per vertex data

cubeVertices = new VertexPositionNormalTexture[36];

Vector3 topLeftFront = new Vector3(-1.0f, 1.0f, 1.0f);

Vector3 bottomLeftFront = new Vector3(-1.0f, -1.0f, 1.0f);

Vector3 topRightFront = new Vector3(1.0f, 1.0f, 1.0f);

Vector3 bottomRightFront = new Vector3(1.0f, -1.0f, 1.0f);

Vector3 topLeftBack = new Vector3(-1.0f, 1.0f, -1.0f);

Vector3 topRightBack = new Vector3(1.0f, 1.0f, -1.0f);

Vector3 bottomLeftBack = new Vector3(-1.0f, -1.0f, -1.0f);

Vector3 bottomRightBack = new Vector3(1.0f, -1.0f, -1.0f);

Vector2 textureTopLeft = new Vector2(0.0f, 0.0f);

Vector2 textureTopRight = new Vector2(1.0f, 0.0f);

Vector2 textureBottomLeft = new Vector2(0.0f, 1.0f);

Vector2 textureBottomRight = new Vector2(1.0f, 1.0f);

Vector3 frontNormal = new Vector3(0.0f, 0.0f, 1.0f);

Vector3 backNormal = new Vector3(0.0f, 0.0f, -1.0f);

Vector3 topNormal = new Vector3(0.0f, 1.0f, 0.0f);

Vector3 bottomNormal = new Vector3(0.0f, -1.0f, 0.0f);

Vector3 leftNormal = new Vector3(-1.0f, 0.0f, 0.0f);

Vector3 rightNormal = new Vector3(1.0f, 0.0f, 0.0f);

// Front face.

cubeVertices[0] =

new VertexPositionNormalTexture(

topLeftFront, frontNormal, textureTopLeft);

cubeVertices[1] =

new VertexPositionNormalTexture(

bottomLeftFront, frontNormal, textureBottomLeft);

cubeVertices[2] =

new VertexPositionNormalTexture(

topRightFront, frontNormal, textureTopRight);

cubeVertices[3] =

new VertexPositionNormalTexture(

bottomLeftFront, frontNormal, textureBottomLeft);

cubeVertices[4] =

new VertexPositionNormalTexture(

bottomRightFront, frontNormal, textureBottomRight);

cubeVertices[5] =

new VertexPositionNormalTexture(

topRightFront, frontNormal, textureTopRight);

// Back face.

cubeVertices[6] =

new VertexPositionNormalTexture(

topLeftBack, backNormal, textureTopRight);

cubeVertices[7] =

new VertexPositionNormalTexture(

topRightBack, backNormal, textureTopLeft);

cubeVertices[8] =

new VertexPositionNormalTexture(

bottomLeftBack, backNormal, textureBottomRight);

cubeVertices[9] =

new VertexPositionNormalTexture(

bottomLeftBack, backNormal, textureBottomRight);

cubeVertices[10] =

new VertexPositionNormalTexture(

topRightBack, backNormal, textureTopLeft);

cubeVertices[11] =

new VertexPositionNormalTexture(

bottomRightBack, backNormal, textureBottomLeft);

// Top face.

cubeVertices[12] =

new VertexPositionNormalTexture(

topLeftFront, topNormal, textureBottomLeft);

cubeVertices[13] =

new VertexPositionNormalTexture(

topRightBack, topNormal, textureTopRight);

cubeVertices[14] =

new VertexPositionNormalTexture(

topLeftBack, topNormal, textureTopLeft);

cubeVertices[15] =

new VertexPositionNormalTexture(

topLeftFront, topNormal, textureBottomLeft);

cubeVertices[16] =

new VertexPositionNormalTexture(

topRightFront, topNormal, textureBottomRight);

cubeVertices[17] =

new VertexPositionNormalTexture(

topRightBack, topNormal, textureTopRight);

// Bottom face.

cubeVertices[18] =

new VertexPositionNormalTexture(

bottomLeftFront, bottomNormal, textureTopLeft);

cubeVertices[19] =

new VertexPositionNormalTexture(

bottomLeftBack, bottomNormal, textureBottomLeft);

cubeVertices[20] =

new VertexPositionNormalTexture(

bottomRightBack, bottomNormal, textureBottomRight);

cubeVertices[21] =

new VertexPositionNormalTexture(

bottomLeftFront, bottomNormal, textureTopLeft);

cubeVertices[22] =

new VertexPositionNormalTexture(

bottomRightBack, bottomNormal, textureBottomRight);

cubeVertices[23] =

new VertexPositionNormalTexture(

bottomRightFront, bottomNormal, textureTopRight);

// Left face.

cubeVertices[24] =

new VertexPositionNormalTexture(

topLeftFront, leftNormal, textureTopRight);

cubeVertices[25] =

new VertexPositionNormalTexture(

bottomLeftBack, leftNormal, textureBottomLeft);

cubeVertices[26] =

new VertexPositionNormalTexture(

bottomLeftFront, leftNormal, textureBottomRight);

cubeVertices[27] =

new VertexPositionNormalTexture(

topLeftBack, leftNormal, textureTopLeft);

cubeVertices[28] =

new VertexPositionNormalTexture(

bottomLeftBack, leftNormal, textureBottomLeft);

cubeVertices[29] =

new VertexPositionNormalTexture(

topLeftFront, leftNormal, textureTopRight);

// Right face.

cubeVertices[30] =

new VertexPositionNormalTexture(

topRightFront, rightNormal, textureTopLeft);

cubeVertices[31] =

new VertexPositionNormalTexture(

bottomRightFront, rightNormal, textureBottomLeft);

cubeVertices[32] =

new VertexPositionNormalTexture(

bottomRightBack, rightNormal, textureBottomRight);

cubeVertices[33] =

new VertexPositionNormalTexture(

topRightBack, rightNormal, textureTopRight);

cubeVertices[34] =

new VertexPositionNormalTexture(

topRightFront, rightNormal, textureTopLeft);

cubeVertices[35] =

new VertexPositionNormalTexture(

bottomRightBack, rightNormal, textureBottomRight);

vertexBuffer = new VertexBuffer(

graphics.GraphicsDevice,

typeof(VertexPositionNormalTexture),

cubeVertices.Length,

BufferUsage.None

);

vertexBuffer.SetData(cubeVertices);

}
|
请原谅我把36个顶点的代码都贴出来了,如果不贴出来,肯定会有人不补全,然后就看不到完整的正方体了。
这里就要说到第一个错误点了:文章中没有列出所有36个顶点的定义,不过示例代码UseBasicEffect中列出了;另一个问题是VertexBuffer的构造函数发生了变化,原文和示例代码中的VertexBuffer构造函数是这样的:
vertexBuffer = new VertexBuffer(

graphics.GraphicsDevice,

VertexPositionNormalTexture.SizeInBytes * cubeVertices.Length,

BufferUsage.None

);
|
而正确的写法应该是:
vertexBuffer = new VertexBuffer(

graphics.GraphicsDevice,

typeof(VertexPositionNormalTexture),

cubeVertices.Length,

BufferUsage.None

);
|
VertexBuffer增加了一个Type类型的参数(第二个),我们必须传入一个IVertexType接口的派生类型,构造函数会用类型和顶点列表的长度计算VertexBuffer的size,这显然比上边的实现好了许多。
分别实现了这三个初始化函数后,我们要在真正的初始化函数Initialize里调用这三个函数,注意Initialize函数不是自己添加的,在Game1类中本来就有:
protected override void Initialize()

{

InitMatrices();

InitEffect();

InitVertexBuffer();

base.Initialize();

}
|
好了,我们在Draw函数里增加绘制方法:
protected override void Draw(GameTime gameTime)

{

GraphicsDevice.Clear(Color.CornflowerBlue);

// TODO: Add your drawing code here

RasterizerState rasterizerState1 = new RasterizerState();

rasterizerState1.CullMode = CullMode.None;

graphics.GraphicsDevice.RasterizerState = rasterizerState1;

GraphicsDevice.SetVertexBuffer(vertexBuffer);

foreach (EffectPass pass in basicEffect.CurrentTechnique.Passes)

{

pass.Apply();

graphics.GraphicsDevice.DrawPrimitives(

PrimitiveType.TriangleList,

0,

36

);

}

base.Draw(gameTime);

}
|
这里包含了第二个错误点,原文没有下面这句(上文高亮标出):
GraphicsDevice.SetVertexBuffer(vertexBuffer); |
如果没有SetVertexBuffer的调用,程序在运行时会遇到下面的异常:
An unhandled exception of type 'System.InvalidOperationException' occurred in Microsoft.Xna.Framework.Graphics.dll

Additional information: A valid vertex buffer (and a valid index buffer if you are using indexed primitives)
 must be set on the device before any draw operations may be performed.
|

原文的调用方式和UseBasicEffect的实现方式完全不同,所以大家要注意一下。毕竟是Beta版,很多文档还没有最后完成。
好了,到这里,其实我们编译运行该程序的话,就可以看到绘制出的立方体来了。但是,我还想再加点――让立方体旋转起来。
在Update函数中增加下面两句(高亮显示):
protected override void Update(GameTime gameTime)

{

// Allows the game to exit

if (GamePad.GetState(PlayerIndex.One).Buttons.Back == ButtonState.Pressed)

this.Exit();

// TODO: Add your update logic here

Matrix matrix = Matrix.CreateRotationX(0.1f);

basicEffect.World = basicEffect.World * matrix;

base.Update(gameTime);

}
|
我们创建了一个沿X轴旋转0.1度的矩阵,与basicEffect中的世界坐标系相乘,就可以使我们绘制出来的立方体每次Update时,都沿着X轴旋转0.1f度。因为角度是float型,千万别忘了0.1f之后的那个f。
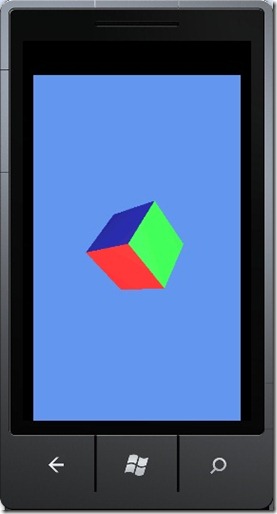
好了,程序最后的样子就是这样的。在第一篇文章里,我留了很多问题,比如3D的基本概念、坐标系、灯光、材质、旋转,希望在后边能够比较从容地解释这些知识。我现在唯一的希望是,不要等到六个月后才有时间再写第二篇……
|


