| 编辑推荐: |
本文主要介绍了使用CLion进行cuda编程,并使用cuda-gdb对核函数进行debug相关内容。希望对你的学习有帮助。
本文来自于CSDN,由火龙果软件Alice编辑推荐。 |
|
前言
在确定了研究方向后,便开始着手研究相关的文献和Code,指导我看到了3D
Gaussian Splatting。以往的DL工作的代码几乎都只建立在Python语言基础上,如果只是Python到还好,勉强还能看懂,但对于CUDA部分的C++代码,那是真看不懂了。而3DGS正是我接触CUDA编程的契机,使得我开始注重自己的全面发展,不想仅仅做一个DL农工,还需要研究一些更深入的东西,因此学习CUDA编程是有必要,而且学习CUDA编程也不亏,顺便把C++的知识也一并不上了。
虽然理想很丰满,但是光配置CUDA编程环境就快给我折磨死了,在没有人指导我的情况下,我断断续续用了快一个月才终于把环境给配置舒服,毕竟拥有一个趁手的工具,干起活来才舒服嘛!
本教程默认你对DL相关的环境配置已经很熟练,不然你也不会来学CUDA编程这种进阶的技术了。
一、环境准备 1.Linux系统,必须的必须,Ubuntn就挺好的,不要用Win虚拟机装Linux,WSL虚拟机也不行,我踩过的坑你就别再往里跳了,Win开发就一托XX。本教程也默认你装好了Linux开发时所需要的一些重要依赖库
2.Cuda和cudnn配置,这点默认你已经配置好了,同样下载比较新的cuda,太低版本的cuda不支持cuda-gdb,我用的cuda11.8,11.0版本的cuda有bug,不要使用,建议跟我的版本一样
3.CLion安装,也默认你已经安装好,CLion下载最新的2023版,Clion版本低不支持一些高版本的Cmake,当然你可以用低版本Clion和低版本Cmake
4.Anaconda安装,并用conda创建好虚拟环境,
conda create -n torch_cuda python=3.8
5.(这一步可进行可不进行)理论上上面这些东西配置好了,就可以开始cuda的开发了,但我建议你把Pytorch也装好(版本不限,最好是比较新版本的torch,太低的怕出现奇怪的问题)。因为Pytorch自带libtorch,不需要你自己再单独下载,同时在C中可以直接导入torch库,方便调用torch提供的tensor等一系列函数,从而方便你进行pytorch+cuda+cpp进行开发。你可以参考我这篇blog:Pytorch
CUDA CPP简易教程,在Windows上操作,Linux同理
conda activate torch_cuda
conda install pytorch==1.13.1 torchvision==0.14.1
torchaudio==0.13.1 pytorch-cuda=11.6 -c pytorch -c
nvidia
二、相关学习资料
- CLion CUDA projects
- Nvidia CUDA-GDB介绍
- 葵佬 Pytorch+cpp/cuda extension 教學
- INSTALLING PREVIOUS VERSIONS OF PYTORCH
三、环境配置
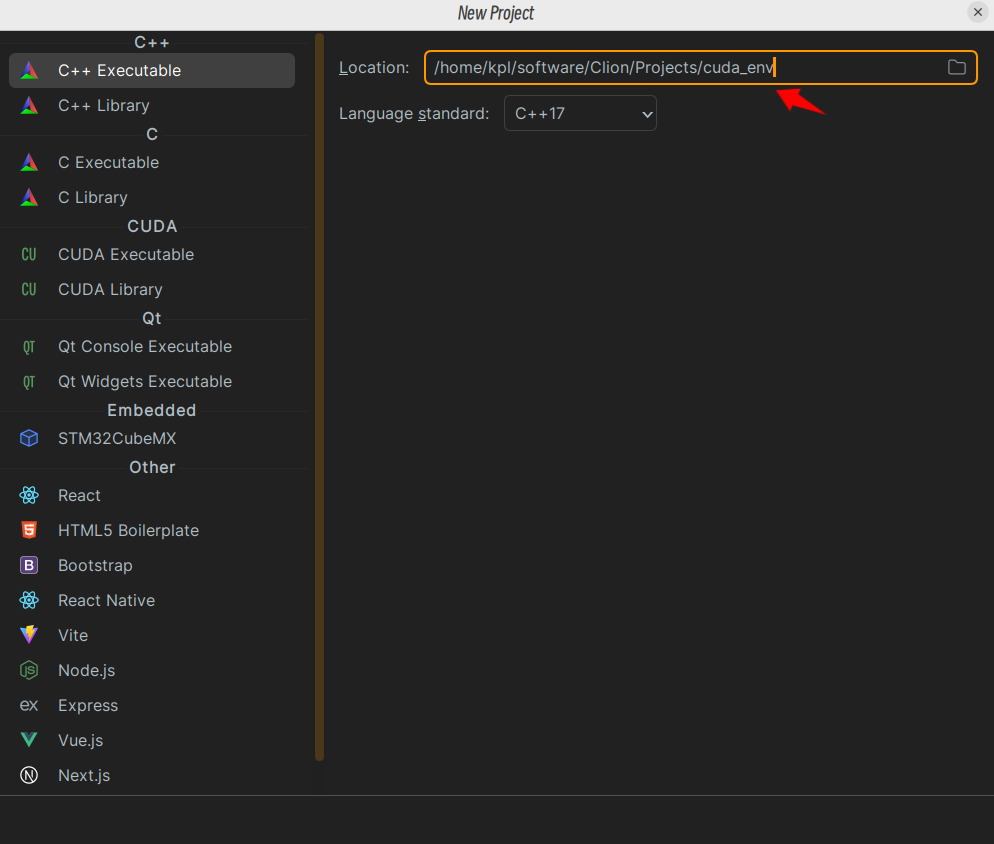
1.新建Clion C++ Executable项目
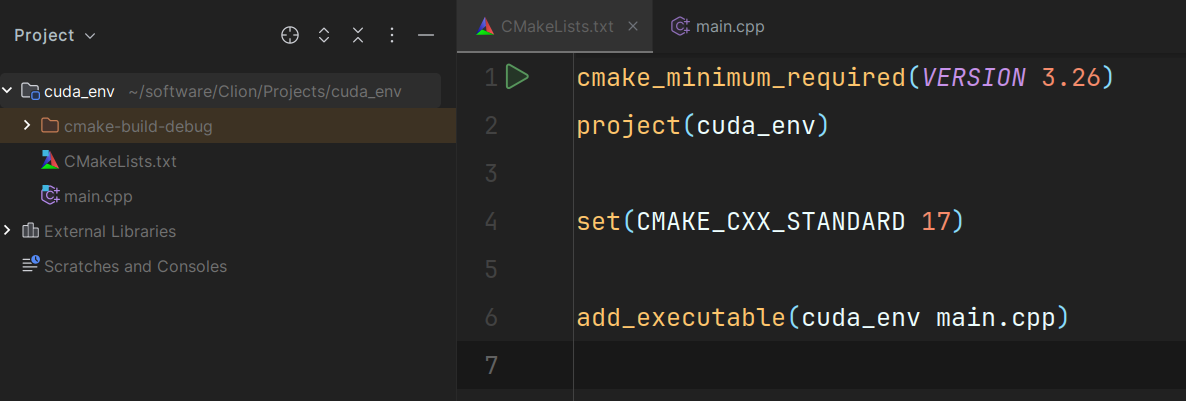
项目已经为你创建好了一个CMakeLists.txt文件
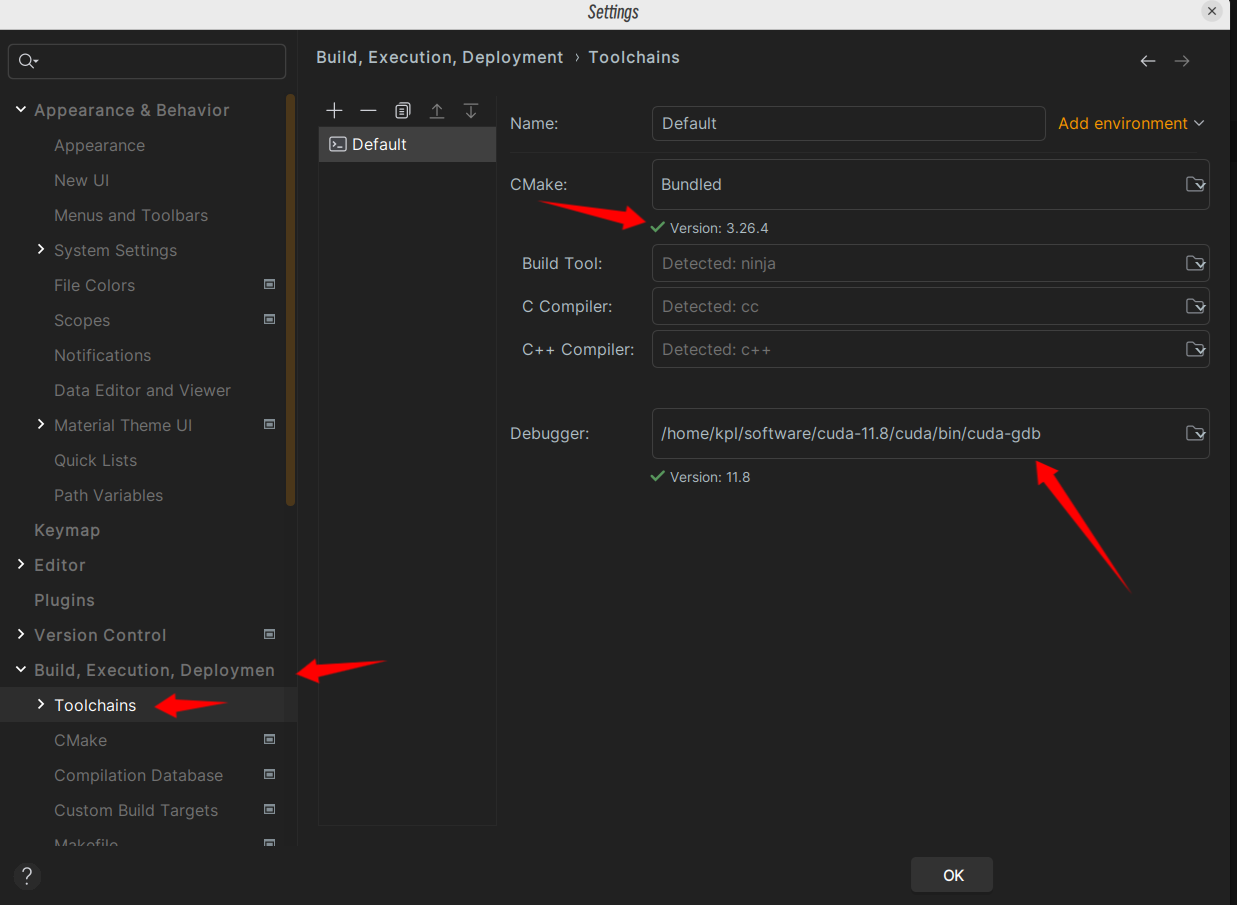
2.在Clion中的ToolChains中配置cuda-gdb
这一步如果你的gcc和g++没有安装,或者缺少别的库,Clion会提示找不到,因此还是要提前把Linux的必备运行库安装好。安装好会出现如下图所示的样子
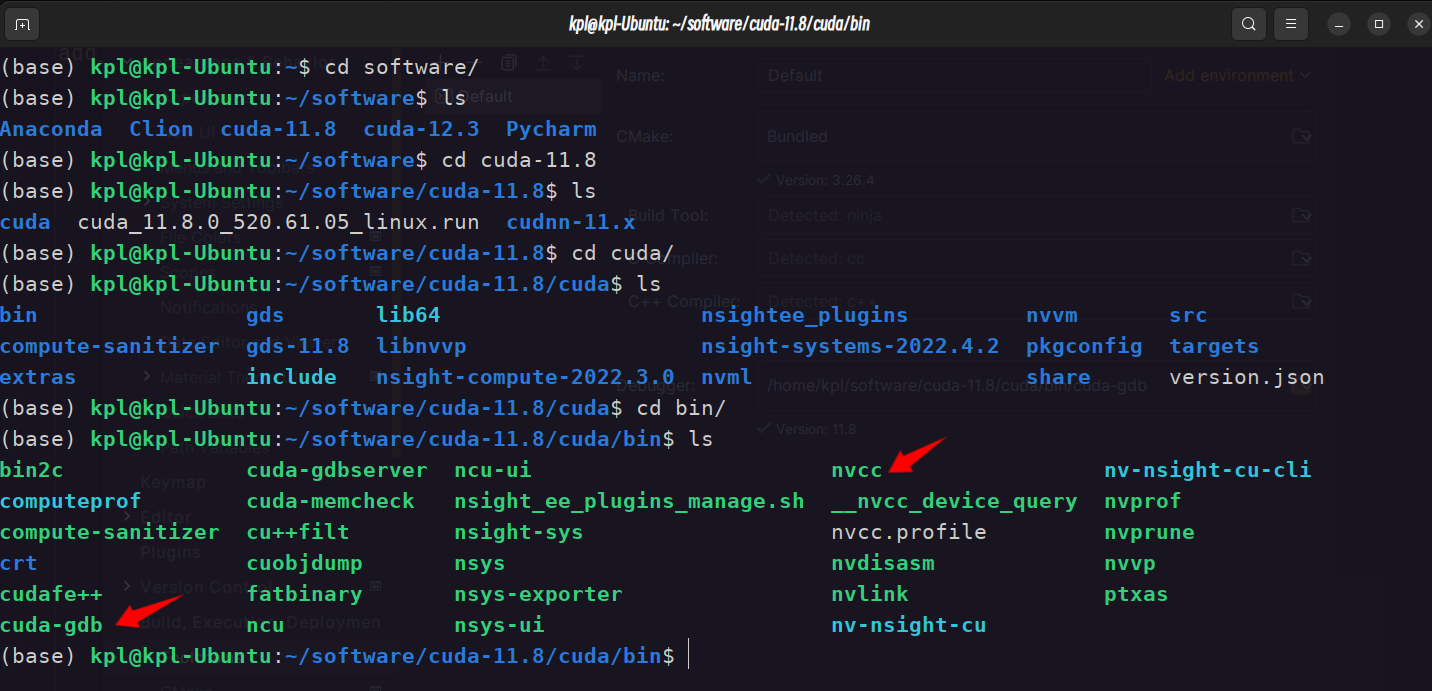
这里的Debugger填写你自己配置好的Cuda自带的cuda-gdb,你可以参考我的路径找到cuda-gdb所在的位置,同时nvcc也在这个路径下,要记住后面要用,如果你不知道如何在本机安装多个版本的cuda,请参考这篇博客:linux非root安装特定版本的cuda。
/home/kpl/software/cuda-11.8/cuda/bin/cuda-gdb
/home/kpl/software/cuda-11.8/cuda/bin/nvcc
3.配置CMake options
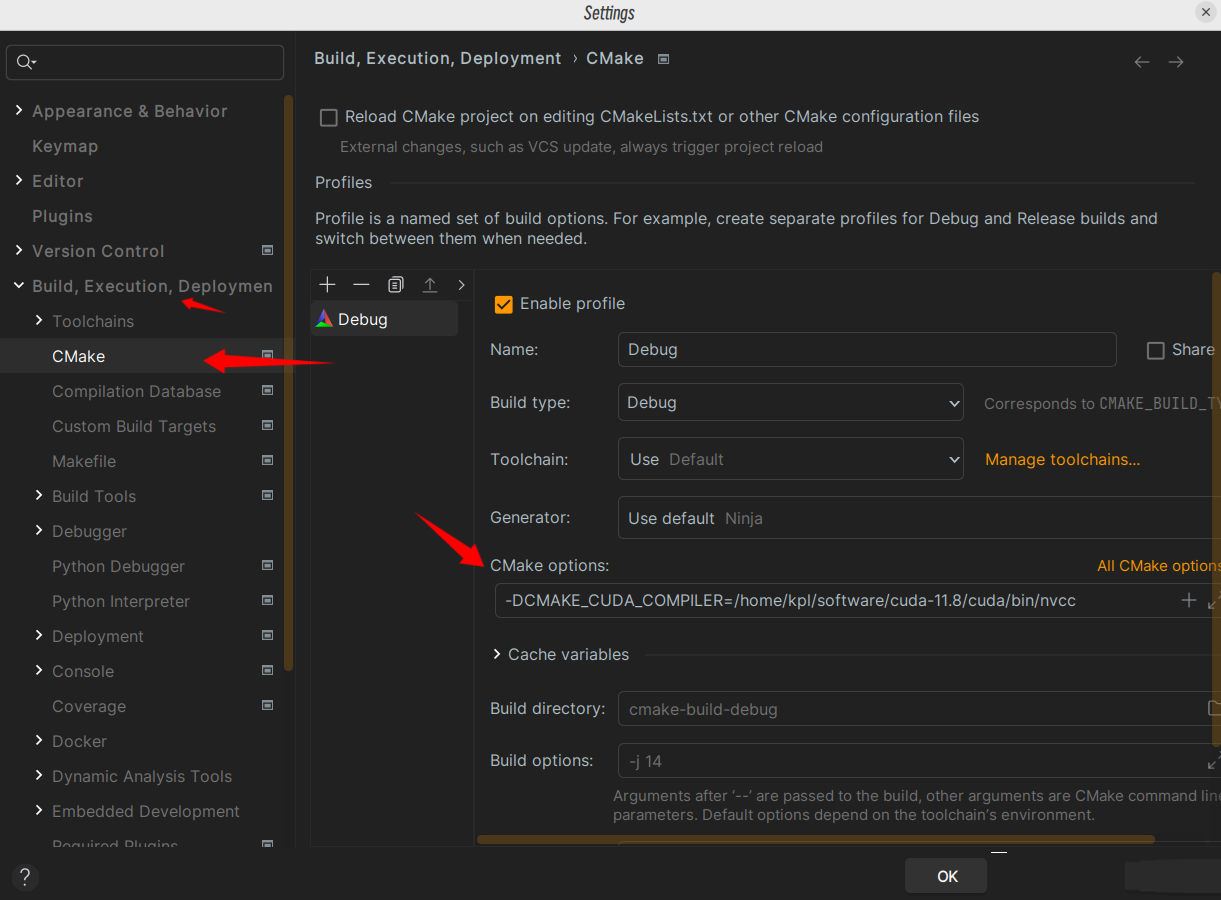
在下图中的CMake options中填下这行命令,让CMake能够找到nvcc编译器,nvcc是专门用于编译核函数:
-DCMAKE_CUDA_COMPILER=/home/kpl/software/cuda-11.8/cuda/bin/nvcc
|
换成你自己的nvcc路径
4.配置CMakeLists.txt
我在配置CMakeLists.txt时遇到的问题是最多的,因为我一开始也不太明白这个文件到底该怎么写,它就像一门新的语言一样尤其固定的写法。通过这次经历也算是了解了CMakeLists.txt的基本写法。下面我按遇到的问题分步骤不断完善CMakeLists.txt。下面这些问题你可能有可能你碰不到,但写上也不会出错。
(1) Failed to compute shorthash for
libnvrtc.so
在CMakeLists.txt开头加上下面内容:
find_package(PythonInterp REQUIRED)
|
(2) c++: error: unrecognized command-line
option ‘-G’
这是因为C++没有-G这个编译选项,这个是nvcc才有的。-g表示主机(CPU)代码编译为可调式版本的,-G表示设备(GPU)代码编译为可调式版本。加入下面内容,才能够让nvcc正确编译设备代码:
set(CUDA_NVCC_FLAGS -g;-G)
|
(3) Caffe2: CUDA cannot be found.
Depending on whether you are building Caffe2or a Caffe2
dependent library, the next warning / error will give
you more info.
CMake找不到CUDA的位置,指定你安装好的CUDA_HOME,填入下面内容:
set(CUDA_TOOLKIT_ROOT_DIR /home/kpl/software/cuda-11.8/cuda)
|
(4) 在.cpp文件中导入torch时找不到torch
这里需要将pytorch提供的libtorch链接进你的cuda项目中
在CMakeLists.txt中加入下面内容:
set(CMAKE_PREFIX_PATH /home/kpl/software/Anaconda/Anaconda/envs/torch_cuda/lib/python3.8/site-packages/torch/share/cmake)
find_package(Torch REQUIRED)
|
/home/kpl/software/Anaconda/Anaconda/envs/torch_cuda这里的torch_cuda是我配置好的conda虚拟环境名,因此你可以按照我这个路径找到你自己使用conda安装好的环境位置,后面的lib/python3.8/site-packages/torch/share/cmake是一样的。
然后在文件最后一行添加下面内容,一定要写在add_executable后面:
target_link_libraries(cuda_env ${TORCH_LIBRARIES})
|
(5) 我的完整CMakeLists.txt内容
find_package(PythonInterp REQUIRED)  # Failed to compute shorthash for libnvrtc.so
cmake_minimum_required(VERSION 3.24)
project(test)

set(CMAKE_CXX_STANDARD 17)
set(CUDA_NVCC_FLAGS -g;-G)  # c++: error: unrecognized command-line option '-G'
set(CUDA_TOOLKIT_ROOT_DIR /home/kpl/software/cuda-11.8/cuda)
# Caffe2: CUDA cannot be found.  Depending on whether you are building Caffe2 or
 a Caffe2 dependent library, the next warning / error will give you more info.
set(CMAKE_PREFIX_PATH /home/kpl/software/Anaconda/Anaconda/envs/torch_cuda/lib/python3.8/site-packages/torch/share/cmake)
find_package(Torch REQUIRED)

add_executable(test main.cpp)
target_link_libraries(test ${TORCH_LIBRARIES})
|
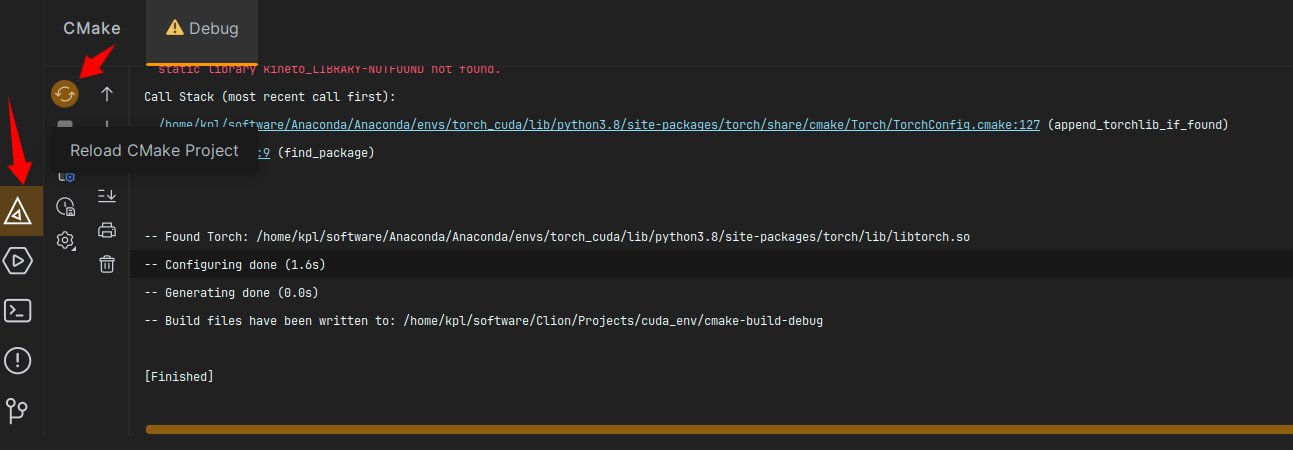
(6) Reload CMake后会有下面的输出
不用管里面的warning,对运行代码没有任何影响
/home/kpl/software/Clion/clion-2023.2.2/bin/cmake/linux/x64/bin/cmake -DCMAKE_BUILD_TYPE=Debug -DCMAKE_MAKE
 _PROGRAM=/home/kpl/software/Clion/clion-2023.2.2/bin/ninja/linux/x64/ninja -DCMAKE_CUDA_COMPILER=/home/kpl/
software/cuda-11.8/cuda/bin/nvcc -G Ninja -S /home/kpl/software/Clion/Projects/cuda_env -B /home/kpl/software/Clion/Projects/cuda_env/cmake-build-debug
-- Found PythonInterp: /usr/bin/python3.10 (found version "3.10.12")
-- The C compiler identification is GNU 11.4.0
-- The CXX compiler identification is GNU 11.4.0
-- Detecting C compiler ABI info
-- Detecting C compiler ABI info - done
-- Check for working C compiler: /usr/bin/cc - skipped
-- Detecting C compile features
-- Detecting C compile features - done
-- Detecting CXX compiler ABI info
-- Detecting CXX compiler ABI info - done
-- Check for working CXX compiler: /usr/bin/c++ - skipped
-- Detecting CXX compile features
-- Detecting CXX compile features - done
-- Performing Test CMAKE_HAVE_LIBC_PTHREAD
-- Performing Test CMAKE_HAVE_LIBC_PTHREAD - Success
-- Found Threads: TRUE
-- Found CUDA: /home/kpl/software/cuda-11.8/cuda (found version "11.8")
-- The CUDA compiler identification is NVIDIA 11.8.89
-- Detecting CUDA compiler ABI info
-- Detecting CUDA compiler ABI info - done
-- Check for working CUDA compiler: /home/kpl/software/cuda-11.8/cuda/bin/nvcc - skipped
-- Detecting CUDA compile features
-- Detecting CUDA compile features - done
-- Caffe2: CUDA detected: 11.8
-- Caffe2: CUDA nvcc is: /home/kpl/software/cuda-11.8/cuda/bin/nvcc
-- Caffe2: CUDA toolkit directory: /home/kpl/software/cuda-11.8/cuda
-- Caffe2: Header version is: 11.8
-- Found CUDNN: /home/kpl/software/cuda-11.8/cuda/lib64/libcudnn.so
-- Found cuDNN: v8.9.7  (include: /home/kpl/software/cuda-11.8/cuda/include, library: /home/kpl/software/cuda-11.8/cuda/lib64/libcudnn.so)
-- /home/kpl/software/cuda-11.8/cuda/lib64/libnvrtc.so shorthash is 672ee683
-- Autodetected CUDA architecture(s):  8.9
-- Added CUDA NVCC flags for: -gencode;arch=compute_89,code=sm_89
CMake Warning at /home/kpl/software/Anaconda/Anaconda/envs/torch_cuda/lib/python3.8/site-packages/torch/share/cmake/Torch/TorchConfig.cmake:22 (message):
  static library kineto_LIBRARY-NOTFOUND not found.
Call Stack (most recent call first):
  /home/kpl/software/Anaconda/Anaconda/envs/torch_cuda/lib/python3.8/site-packages/torch/share/cmake/Torch/TorchConfig.cmake:127 (append_torchlib_if_found)
  CMakeLists.txt:9 (find_package)


-- Found Torch: /home/kpl/software/Anaconda/Anaconda/envs/torch_cuda/lib/python3.8/site-packages/torch/lib/libtorch.so
-- Configuring done (1.6s)
-- Generating done (0.0s)
-- Build files have been written to: /home/kpl/software/Clion/Projects/cuda_env/cmake-build-debug

[Finished]
|
5.cuda-gdb测试
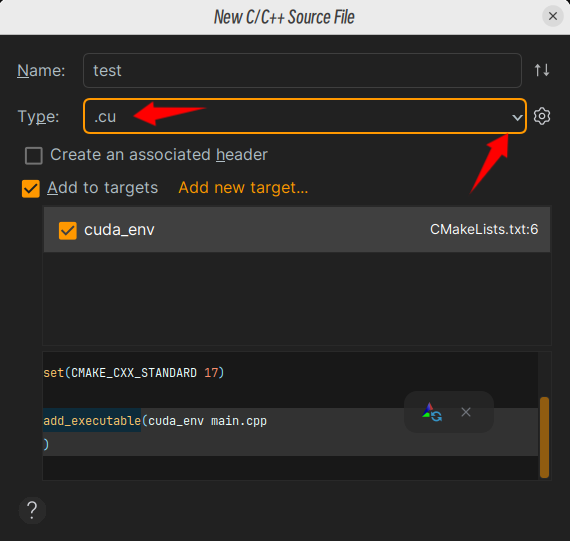
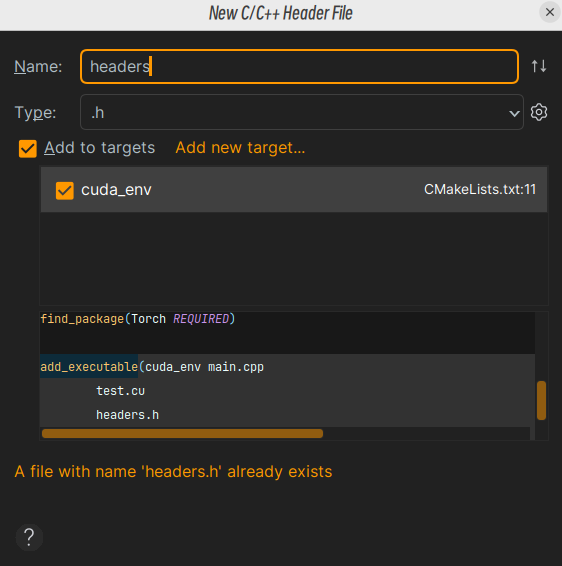
(1) 创建test .cu和headers.h文件
kernel核函数只能写在.cu文件里,但是.cu文件既可以写主机代码也可以写GPU代码。
在test.cu写入下面内容:
#include <stdio.h>
__global__ void add(int a, int b){
int c = a + b;
int d = c + a;
printf("c: %d\n", c);
}
void test_add(int a, int b){
add<<<1, 1>>>(a, b);
cudaDeviceReset();
}
|
在headers.h中写入下面内容:
#ifndef CUDA_ENV_HEADERS_H
#define CUDA_ENV_HEADERS_H
#endif
void test_add(int a, int b);
|
(2) 在main.c中调用test_add函数
因为.c文件只能调用主机函数,因此不能不能直接调用add核函数,而.cu文件既可以写主机函数,也可以写设备函数,因此可以在.cu中写主机函数调用核函数,然后再在.c文件中调用.cu中的主机函数。
#include <iostream>
#include "headers.h"

int main() {
    int a = 1, b = 2;
    test_add(a, b);
    std::cout << "Hello, World!" << std::endl;
    return 0;
}
|
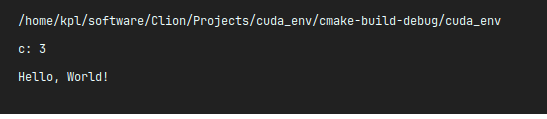
run main.c查看是否正确执行代码,正确运行结果如下:
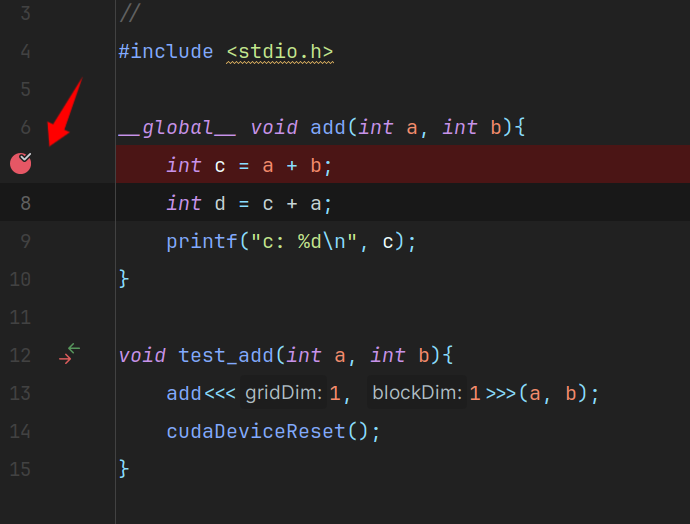
(3) 在设备函数中加入断点 ,调试核函数
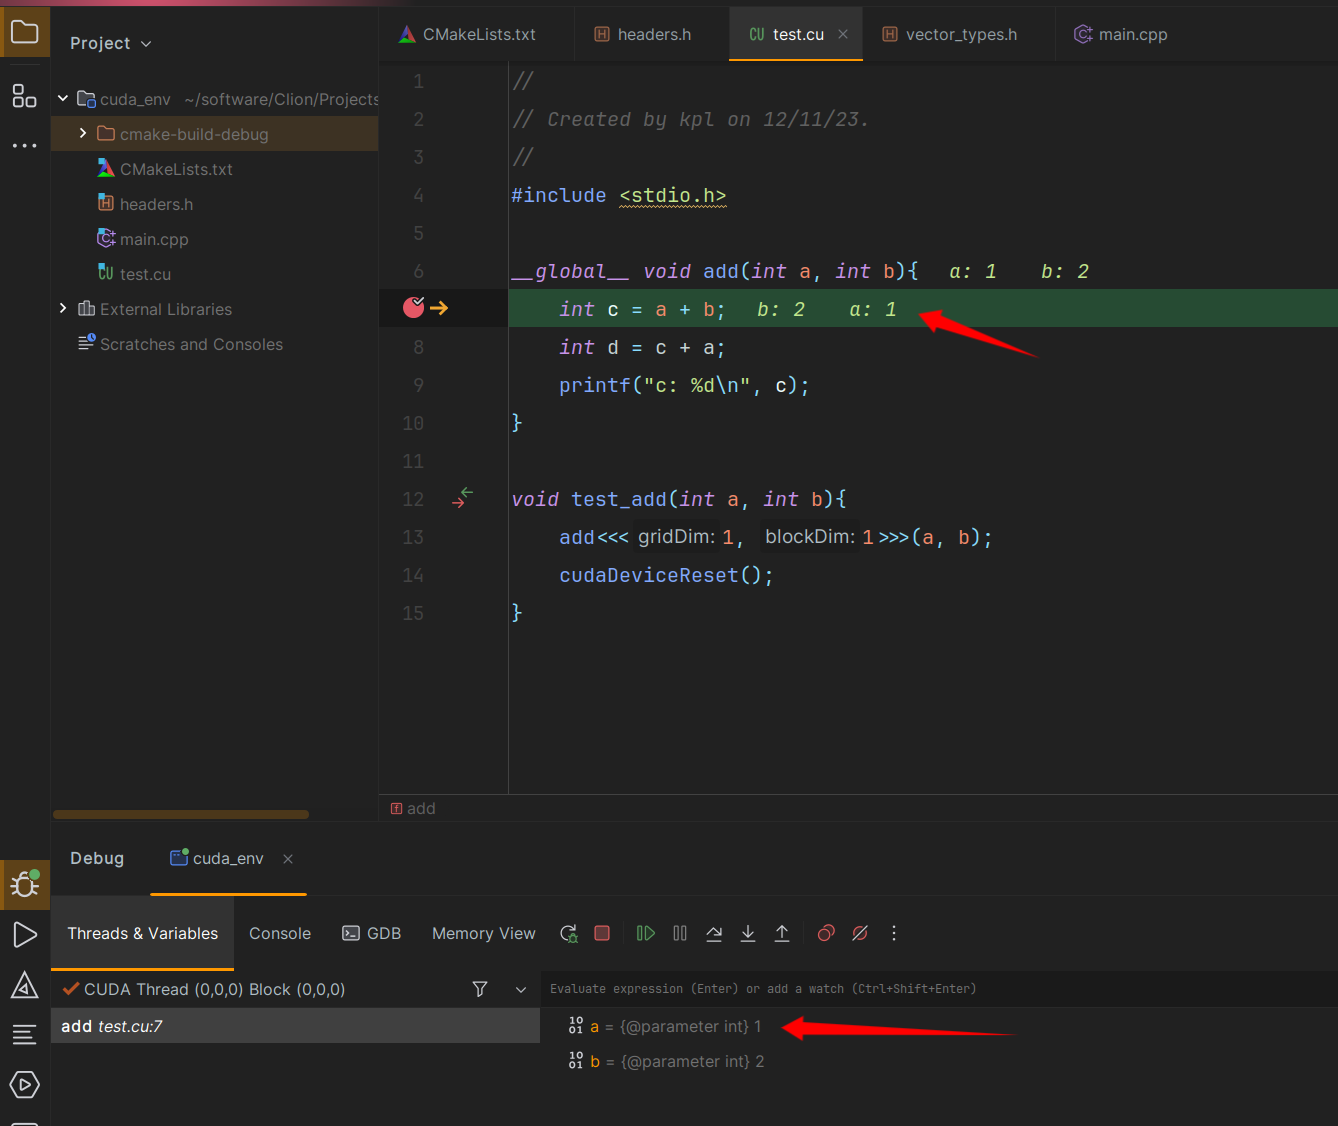
切记:只有在核函数中加入断点才能进入核函数进行调试,没有办法使用Step
into进入核函数
使用Step over 或者 Resume Program跳转到断点位置
如果你能复现出和我一样的结果,说明你成功开启了cuda-gdb,你可以爽快的进行cuda编程的开发辣! | 
 学习助手
学习助手




 订阅
订阅