| БрМЭЦМі: |
БОЮФРДздгкcsdnЃЌБОЮФжиЕуЗжЮіЪЙгУJMSЯђactiveMQжаМфМўЗЂЫЭЯћЯЂЕФЙ§ГЬЗжЮіЃЌЯЃЭћЖдФњЕФбЇЯАгаЫљАяжњЁЃ
|
|
ЭЌВНЗЂЫЭгывьВНЗЂЫЭ
activeMQЗЂЫЭЯћЯЂПЭЛЇЖЫЗЂЫЭЯћЯЂЗжЮЊЭЌВНЗЂЫЭгывьВНЗЂЫЭ
ЭЌВНЗЂЫЭЃЌЗЂЫЭепЗЂЫЭвЛЬѕЯћЯЂЛсзшШћжБЕНbrokerЗДРЁвЛИіШЗШЯЯћЯЂИјЗЂЫЭепЃЌБэЪОЯћЯЂвбОБЛbrokerДІРэЁЃетИіЛњ
жЦЬсЙЉСЫЯћЯЂЕФАВШЋадБЃеЯЃЌгЩгкЪЧзшШћЕФВйзїЃЌЛсгАЯьЕНПЭЛЇЖЫЯћЯЂЗЂЫЭЕФадФмЁЃ
вьВНЗЂЫЭЃЌЗЂЫЭепВЛашвЊЕШД§brokerЬсЙЉЗДРЁИјЗЂЫЭепЃЌадФмЯрЖдНЯИпЁЃЕЋЪЧПЩФмЛсГіЯжЯћЯЂЖЊЪЇЕФЧщПіЁЃЫљ
вдЪЙгУвьВНЗЂЫЭЕФЧАЬсЪЧдкФГаЉЧщПіЯТдЪаэГіЯжЪ§ОнЖЊЪЇЕФЧщПіЁЃ
ФЧУДдкЪВУДЧщПіЯТбЁдёЭЌВНЗЂЩњЃЌЪВУДЧщПіЯТЪЧбЁдёвьВНЗЂЫЭФиЃП
Г§ШЅЮвУЧШЫЮЊЩшжУЕФЗНЪНЃЌЦфФЌШЯЕФбЁдёВпТдзмНсШчЯТЃК
1.ЗЧГжОУЛЏЕФЯћЯЂЖМЪЧвьВНЗЂЫЭЕФЁЃ
2.ГжОУЛЏЯћЯЂдкЗЧЪТЮёФЃЪНЯТЪЧЭЌВНЗЂЫЭЕФЁЃ
3.дкПЊЦєЪТЮёЕФЧщПіЯТЃЌЯћЯЂЖМЪЧвьВНЗЂЫЭЁЃ
гЩгквьВНЗЂЫЭЕФаЇТЪЛсБШЭЌВНЗЂЫЭадФмИќИпЃЌдкЗЂЫЭГжОУЛЏЯћЯЂЕФЪБКђЃЌОЁСПШЅПЊЦєЪТЮёЛсЛАЁЃЛђепЩшжУЪЙгУвьВНЗЂЫЭЁЃ
вдЩЯШ§жжФЌШЯВпТдЃЌдкдДТыжаЖМЛсЬхЯжГіРДЃЌЩдКѓдкдДТыжаЗжЮіЁЃ
Г§СЫФЌШЯЩшжУЃЌЮвУЧПЩвдШЯЮЊЩшжУЗЂЫЭФЃЪНЁЃзмНсШчЯТШ§жжЗНЪНЁЃ
| 1.ConnectionFactory
connectionFactory=new ActiveMQConnectionFactory("tcp://192.168.0.15:61616?
jms.useAsyncSend=true"); |
| 2.((ActiveMQConnectionFactory)
connectionFactory).setUseAsyncSend(true); |
| 3.((ActiveMQConnection)connection).setUseAsyncSend(true);
|
вьВНЗЂЫЭЗжЮі
ЪзЯШЗжЮівьВНЗЂЫЭЙ§ГЬЃЌЦфЪ§ОнСїзЊШчЯТЭМЫљЪОЁЃ

producerWindow
producerWindowжївЊЪЧеыЖдвьВНЗЂЫЭЯћЯЂЪБЃЌПижЦдЪаэФмЙЛЛ§бЙЕФЯћЯЂРлМЦДѓаЁЃЌетаЉЯћЯЂУЛгаЕУЕНbrokerЕФackЃЌдкЕУЕНackжЎКѓЛсМѕШЅЯргІЕФЯћЯЂsizeЃЌЪЭЗХproducerWindowЁЃ
етИіproducerWindowЕФДѓаЁЩшжУга2жжЗНЪН
1.дкbrokerUrlжаЩшжУ: ЁАtcp : //localhost:61616?jms
. producerWindowSize = 1048576ЁБ,етжжЩшжУНЋЛсЖдЫљгаЕФ producerЩњаЇЁЃ
2.дкdestinationUriжаЩшжУ: ЁА test-queue ?producer.windowSize
= 1048576 ЁБ,ДЫВЮЪ§жЛЛсЖдЪЙгУДЫ Destination ЪЕР§ ЕФproducerЪЇаЇЃЌНЋЛсИВИЧbrokerUrlжаЕФproducerWindowSizeжЕЁЃ
ЭЈЙ§ЩшжУproducerWindowДѓаЁПЩвдПижЦЯћЯЂЗЂЫЭЕФСїСППижЦЁЃ
ЯТУцПЊЪМИњзйдДТыЗжЮіЭМжаЕФСїГЬЁЃ
ActiveMQMessageProducer.send
ЗЂЫЭЗНЗЈИњзйЃЌЪзЯШЕФЙиМќЗНЗЈОЭЪЧетИіЃЌдДТыШчЯТЁЃ
public void send(Destination
destination, Message message, int deliveryMode,
int priority, long timeToLive, AsyncCallback onComplete)
throws JMSException {
checkClosed();
if (destination == null) {
if (info.getDestination() == null) {
throw new UnsupportedOperationException("A
destination must be specified.");
}
throw new InvalidDestinationException("Don't
understand null destinations");
}
ActiveMQDestination dest;
if (destination.equals(info.getDestination()))
{
dest = (ActiveMQDestination)destination;
} else if (info.getDestination() == null) {
dest = ActiveMQDestination.transform(destination);
} else {
throw new UnsupportedOperationException("This
producer can only send messages to: " + this.info.getDestination().getPhysicalName());
}
if (dest == null) {
throw new JMSException("No destination specified");
}
if (transformer != null) {
Message transformedMessage = transformer.producerTransform(session,
this, message);
if (transformedMessage != null) {
message = transformedMessage;
}
}
if (producerWindow != null) {
try {
//ДАПкДѓаЁЃЌжДааЪЧЗёзшШћ
producerWindow.waitForSpace();
} catch (InterruptedException e) {
throw new JMSException("Send aborted due
to thread interrupt.");
}
}
this.session.send(this, dest, message, deliveryMode,
priority, timeToLive, producerWindow, sendTimeout,
onComplete);
stats.onMessage();
}
|
ЩЯУцЕФДњТыИљОнвьВНЕФСїГЬЭМЗжЮіЃЌПДЕНЪЧЯШашвЊИљОнproducerWindowЃЌРДХаЖЯЪЧЗёзшШћЕФЃЌШчЙћ
producerWindow ВЛЙЛЃЌФЧУД producerWindow.waitForSpace();
ОЭЛсзшШћЕШД§ЁЃ
protected void
send(ActiveMQMessageProducer producer, ActiveMQDestination
destination, Message message, int deliveryMode,
int priority, long timeToLive,
MemoryUsage producerWindow, int sendTimeout, AsyncCallback
onComplete) throws JMSException {
checkClosed();
if (destination.isTemporary() && connection.isDeleted(destination))
{
throw new InvalidDestinationException("Cannot
publish to a deleted Destination: " + destination);
}
//ЛёШЁЛсЛАЕФМрЪгЦї
synchronized (sendMutex) {
// tell the Broker we are about to start a new
transaction
//ПЊЦєЪТЮё
doStartTransaction();
TransactionId txid = transactionContext.getTransactionId();
long sequenceNumber = producer.getMessageSequence();
//......зщзАЯћЯЂФкШн
//ЁЃЁЃЁЃЁЃЁЃЁЃ
//ХаЖЯЪЧвЛВПЛЙЪЧЭЌВНЗЂЫЭ
if (onComplete==null && sendTimeout <=
0 && !msg.isResponseRequired() &&
!connection.isAlwaysSyncSend() && (!msg.isPersistent()
|| connection.isUseAsyncSend() || txid != null))
{
this.connection.asyncSendPacket(msg);
if (producerWindow != null) {
// Since we defer lots of the marshaling till
we hit the
// wire, this might not
// provide and accurate size. We may change over
to doing
// more aggressive marshaling,
// to get more accurate sizes.. this is more important
once
// users start using producer window
// flow control.
int size = msg.getSize();
producerWindow.increaseUsage(size);
}
} else {
if (sendTimeout > 0 && onComplete==null)
{
this.connection.syncSendPacket(msg,sendTimeout);
}else {
this.connection.syncSendPacket(msg, onComplete);
}
}
}
}
|
ЩЯУцетЖЮДњТыЃЌИљОнвьВНСїГЬЭМРДЗжЮіЃЌжївЊПДЕФОЭЪЧХаЖЯЪЧвьВНЛЙЪЧЭЌВНЗЂЫЭЕФДњТыЃЌвьВНЗЂЫЭашвЊТњзуЃК
onComplete==null
&& sendTimeout <= 0 && !msg.isResponseRequired()
&& !connection.isAlwaysSyncSend() &&
(!msg.isPersistent() || connection.isUseAsyncSend()
|| txid != null
|
onComplete==null:ЗЂЫЭЛиЕїЮЊПеЁЃФЌШЯТњзу
sendTimeout <= 0ЃКЗЂЫЭГЌЪБЪБМфаЁгкЕШгк0ЁЃФЌШЯТњзу
!msg.isResponseRequired()ЃКЯћЯЂВЛашвЊЯьгІЁЃФЌШЯТњзу
!connection.isAlwaysSyncSend()ЃКСЌНгВЛФмЩшжУЮЊЭЌВНЗЂЫЭЁЃФЌШЯТњзу
(!msg.isPersistent() || connection.isUseAsyncSend()
|| txid != null)ЃКЪЧЗЧГжОУЛЏЯћЯЂЛђепЩшжУЮЊЪЙгУвьВНЗЂЫЭЛђепПЊЦєСЫЪТЮёЃЌДгетРяПЩвдПДГіФЌШЯВпТджаЕФЃК
1.ЗЧГжОУЛЏЕФЯћЯЂЖМЪЧвьВНЗЂЫЭЕФЁЃ!msg.isPersistent()
3.дкПЊЦєЪТЮёЕФЧщПіЯТЃЌЯћЯЂЖМЪЧвьВНЗЂЫЭЁЃtxid != null
ActiveMQConnection.asyncSendPacket->doAsyncSendPacket
ИњзйЗЂЫЭЃЌЕНШчЯТДњТыЁЃ
private void
doAsyncSendPacket(Command command) throws JMSException
{
try {
this.transport.oneway(command);
} catch (IOException e) {
throw JMSExceptionSupport.create(e);
}
}
|
ЩЯУцДњТыЕФtransportЖдЯѓдкЖЈвхРяУцУЛгаНјааЙЙдьЃЌФЧУДВТВтгІИУЪЧдкДДНЈActiveMQConnectionЪБЃЌЙЙдьЗНЗЈРяУцзЂШыЕФЃЌПДвЛЯТзЂШыЕФЪЕР§ЪЧЪВУДЁЃ
ActiveMQConnectionFactory.createTransport
ДгconnectionFactory.createConnection()ЗНЗЈвЛТЗИњзйЃЌзюКѓЕНСЫШчЯТДњТы
protected Transport
createTransport() throws JMSException {
try {
URI connectBrokerUL = brokerURL;
//ЛёШЁurlжаЖЈвхЕФСЌНгФЃЪН
String scheme = brokerURL.getScheme();
if (scheme == null) {
throw new IOException("Transport not scheme
specified: [" + brokerURL + "]");
}
if (scheme.equals("auto")) {
connectBrokerUL = new URI(brokerURL.toString().replace("auto",
"tcp"));
} else if (scheme.equals("auto+ssl"))
{
connectBrokerUL = new URI(brokerURL.toString().replace("auto+ssl",
"ssl"));
} else if (scheme.equals("auto+nio"))
{
connectBrokerUL = new URI(brokerURL.toString().replace("auto+nio",
"nio"));
} else if (scheme.equals("auto+nio+ssl"))
{
connectBrokerUL = new URI(brokerURL.toString().replace("auto+nio+ssl",
"nio+ssl"));
}
return TransportFactory.connect(connectBrokerUL);
} catch (Exception e) {
throw JMSExceptionSupport.create("Could not
create Transport. Reason: " + e, e);
}
}
|
РДЕНЩЯУцетЖЮДњТыЃЌЪЧИљОнЮвУЧbrokerURLжаЕФschemeРДЙЙНЈвЛИіuriЖдЯѓЃЌШЛКѓгУетИіuriЖдЯѓЕїгУTransportFactory
.connect(connectBrokerUL) ;ЛёШЁЖдгІЕФtransportЪЕР§ЁЃеІвЛПДжЎЯТЃЌгаЕуЯёdubboдДТыжаРћгУurlВЮЪ§Ч§ЖЏЃЌЪЪХфЦїИљОнurlВЮЪ§ЕФВЛЭЌЃЌМгдиВЛЭЌЕФЪЕЯжРрЪЕР§ЁЃНгзХИњзйTransportFactory
.connect(connectBrokerUL) ;ПДЪЧВЛЪЧетбљЁЃ
public static
Transport connect(URI location) throws Exception
{
TransportFactory tf = findTransportFactory(location);
return tf.doConnect(location);
}
public static TransportFactory findTransportFactory(URI
location) throws IOException {
String scheme = location.getScheme();
if (scheme == null) {
throw new IOException("Transport not scheme
specified:
[" + location + "]");
}
TransportFactory tf = TRANSPORT_FACTORYS.get(scheme);
if (tf == null) {
// Try to load if from a META-INF property.
try {
tf = (TransportFactory)TRANSPORT_FACTORY_FINDER.
newInstance
(scheme);
TRANSPORT_FACTORYS.put(scheme, tf);
} catch (Throwable e) {
throw IOExceptionSupport.create("Transport
scheme NOT recognized: [" + scheme + "]",
e);
}
}
return tf;
}
|
ПЩвдПДГіЪЧдк(TransportFactory)TRANSPORT_FACTORY_FINDER.newInstance(scheme);ДДНЈЪЕР§ЕФЃЌВщПДTRANSPORT_FACTORY_FINDERЕФЖЈвхШчЯТЁЃ
| private static
final FactoryFinder TRANSPORT_FACTORY_FINDER =
new FactoryFinder("META-INF/services/org/apache/activemq/transport/");
|
дкnewInstanceЗНЗЈжаЃЌДњТыШчЯТ
public Object
newInstance(String key) throws IllegalAccessException,
InstantiationException, IOException, ClassNotFoundException
{
return objectFactory.create(path+key);
}
|
ЩЯУцЕФpathОЭЪЧЁБЁА META-INF/services/org/apache/activemq/transport/ЁБЁА
, keyдкЮвУЧЕФbrokerUrlОЭЪЧtcpЃЌВТВт
ОЭЪЧеввЛИідкИУТЗОЖЯТЕФЮФМўжаЖЈвхЕФРрШЋТЗОЖзїЮЊЪЕР§ЛЏЕФРраЭаХЯЂЃЌВщПДТЗОЖЯТЕФЮФМўаХЯЂШч
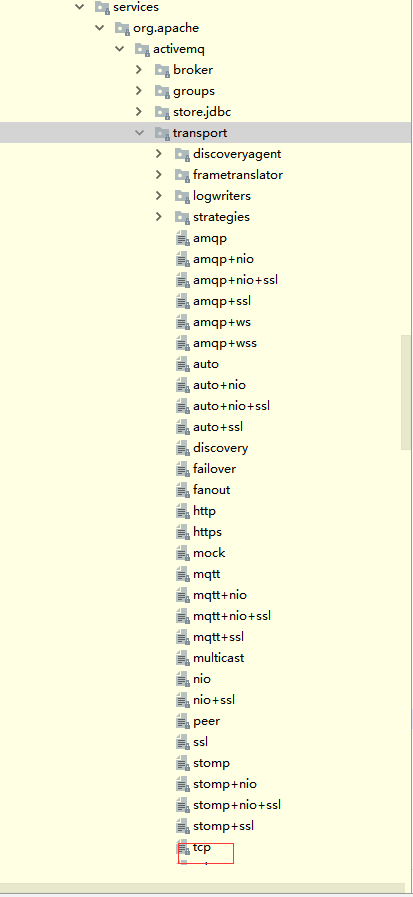
ЛЙецгавЛИіtcpЮФМўЃЌДђПЊПД
class=org.apache.activemq.transport.tcp.
TcpTransportFactory |
КѓајФмЙРМЦЕНОЭЪЧЪЕР§ЛЏвЛИіTcpTransportFactoryЃЌШЛКѓЛиЕНЯТУцЕФДњТыЁЃ
public static
Transport connect(URI location) throws Exception
{
TransportFactory tf = findTransportFactory(location);
return tf.doConnect(location);
}
|
TcpTransportFactory.doConnect
public Transport
doConnect(URI location) throws Exception {
try {
Map<String, String> options = new HashMap<String,
String>(URISupport.parseParameters(location));
if( !options.containsKey("wireFormat.host")
) {
options.put("wireFormat.host", location.getHost());
}
WireFormat wf = createWireFormat(options);
//ДДНЈTransport
Transport transport = createTransport(location,
wf);
//АќзАTransport
Transport rc = configure(transport, wf, options);
//remove auto
IntrospectionSupport.extractProperties(options,
"auto.");
if (!options.isEmpty()) {
throw new IllegalArgumentException("Invalid
connect parameters: " + options);
}
return rc;
} catch (URISyntaxException e) {
throw IOExceptionSupport.create(e);
}
}
|
ЩЯУцДњТыОЭжДааСЫеце§ЕФДДНЈTransportЃЌЭЌЪБИјTransportАќзАСЫЭтГЧДІРэТпМЃЌОпЬхАќзАдкЃЌШчЯТДњТы
public Transport
configure(Transport transport,
WireFormat wf,
Map options) throws Exception {
transport = compositeConfigure(transport, wf,
options);
transport = new MutexTransport(transport);
transport = new ResponseCorrelator(transport);
return transport;
}
public Transport compositeConfigure(Transport
transport,
WireFormat format, Map options) {
//ШчЙћХфжУСЫаДГЌЪБдђжДааАќзАWriteTimeoutFilter
if (options.containsKey(WRITE_TIMEOUT_FILTER))
{
transport = new WriteTimeoutFilter(transport);
String soWriteTimeout = (String)options.remove
(WRITE_TIMEOUT_FILTER);
if (soWriteTimeout!=null) {
((WriteTimeoutFilter)transport).setWriteTimeout
(Long.parseLong
(soWriteTimeout));
}
}
IntrospectionSupport.setProperties(transport,
options);
return transport;
}
|
ЫљвдЫцКѓжДааonewayЕФTransportЪЕР§ЪЧетбљЕФЃКResponseCorrelatorЃЈMutexTransportЃЈTcpTransportЃЉЃЉЃЌдкЕїгУЪБОЭЛсЙЙГЩЕїгУСДЬѕж№ВуЕїгУЁЃ
ResponseCorrelator.oneway
| public void
oneway(Object o) throws IOException {
Command command = (Command)o;
command.setCommandId(sequenceGenerator.
getNextSequenceId());
command.setResponseRequired(false);
next.oneway(command);
} |
MutexTransport.oneway
ИКд№МЯЫј
@Override
public void oneway(Object command) throws IOException
{
writeLock.lock();
try {
next.oneway(command);
} finally {
writeLock.unlock();
}
}
|
TcpTransport.oneWay
вьВНЗЂЫЭЯћЯЂ
@Override
public void oneway(Object command) throws IOException
{
checkStarted();
wireFormat.marshal(command, dataOut);
dataOut.flush();
}
|
етжжСДЪНДњТыЗчИёжЕЕУбЇЯАЃЌТпМГщГівВКмЧЩУюЕФЗжВМдкВЛЭЌЕФДІРэЦїжаЁЃ
ВюЕуЭќСЫЃЌзюКѓЛЙвЊдіМгproducerWindowSize
if (producerWindow
!= null) {
// Since we defer lots of the marshaling till
we hit the
// wire, this might not
// provide and accurate size. We may change over
to doing
// more aggressive marshaling,
// to get more accurate sizes.. this is more important
once
// users start using producer window
// flow control.
int size = msg.getSize();
producerWindow.increaseUsage(size);
}
|
ШЛКѓЃЌвьВНЗЂЫЭЕФСїГЬИуЖЈЁЃ
ЭЌВНЗЂЫЭЯћЯЂЗжЮі
ActiveMqConnection.syncSendPacket
public Response
syncSendPacket(Command command, int timeout) throws
JMSException {
if (isClosed()) {
throw new ConnectionClosedException();
} else {
try {
//ЕїгУTransportЕФrequest'ЗНЗЈ
Response response = (Response)(timeout > 0
? this.transport.request(command, timeout)
: this.transport.request(command));
if (response.isException()) {
ExceptionResponse er = (ExceptionResponse)response;
if (er.getException() instanceof JMSException)
{
throw (JMSException)er.getException();
} else {
if (isClosed()||closing.get()) {
LOG.debug("Received an exception but connection
is closing");
}
JMSException jmsEx = null;
try {
jmsEx = JMSExceptionSupport.create(er.getException());
} catch(Throwable e) {
LOG.error("Caught an exception trying to
create a JMSException for " +er.getException(),e);
}
if (er.getException() instanceof SecurityException
&& command instanceof ConnectionInfo){
forceCloseOnSecurityException(er.getException());
}
if (jmsEx !=null) {
throw jmsEx;
}
}
}
return response;
} catch (IOException e) {
throw JMSExceptionSupport.create(e);
}
}
}
|
дквьВНЗжЮіЪБвбОжЊЕРTransportЪЧвЛИіЕїгУСДЃЌЪзЯШРДЕНЕФЪЧ
ResponseCorrelator.request
public Object
request(Object command) throws IOException {
FutureResponse response = asyncRequest(command,
null);
return response.getResult();
}
|
ШЛКѓФуЛсЗЂЯжЃЌЦфЪЕЭЌВНЗЂЫЭвВЪЧЯШжДаавьВНЗЂЫЭЧыЧѓasyncRequestЃЌШЛКѓдйзшШћresponse.getResult()ЛёШЁЯьгІЕФЃЌЫљвдЦфЪЕЪЧЯШвьВНКѓЭЌВНЕФЙ§ГЬЁЃ
public FutureResponse
asyncRequest(Object o, ResponseCallback responseCallback)
throws
IOException {
Command command = (Command) o;
command.setCommandId(sequenceGenerator.
getNextSequenceId());
command.setResponseRequired(true);
FutureResponse future = new FutureResponse
(responseCallback, this);
IOException priorError = null;
synchronized (requestMap) {
priorError = this.error;
if (priorError == null) {
requestMap.put(new Integer(command.getCommandId()),
future);
}
}
if (priorError != null) {
future.set(new ExceptionResponse(priorError));
throw priorError;
}
//вьВНСїГЬ
next.oneway(command);
return future;
}
|
|


