| UML软件工程组织 | |||
| |
|||
|
|||
Configuring ClearQuest to use DB2 as
your back-end RDBMS
2008-08-15 作者:Forrest Xia 来源:IBM
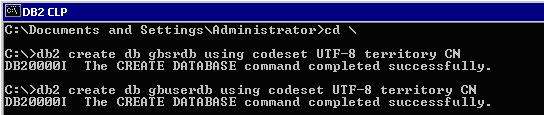
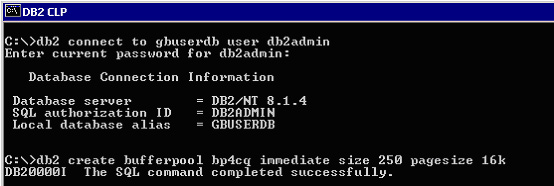
As you may know, IBM® Rational® ClearQuest® supports several different relational database management systems (RDBMS) on the back-end. It is important to recognize, though, that different database vendors have various default settings that could influence ClearQuest's configuration and deployment. When the ClearQuest administrator is not familiar with the specific attributes of a particular RDBMS, configuring ClearQuest can become rather time-consuming. If you want to use DB2 as your back-end database, but have limited experience on DB2, this article should serve as a good point of reference. IntroductionIBM® DB2® is a comprehensive RDBMS product, which IBM® Rational® ClearQuest® fully supports. This article provides a step-by-step configuration guide to give you a clear picture regarding how to configure DB2 as your ClearQuest back-end RDBMS. For the most common configuration, ClearQuest requires two separate databases: the Schema Repository database and the User database. Therefore, the first step is to create two DB2 databases. Note: remember to create a new buffer pool with a special setting in your User database to allow the system to read certain types of long ClearQuest records, such as defect records. Detailed Steps:1. Create a database for the schema repository with the DB2 command line processor (CLP) using the common DB2 database creation syntax: db2 create db [databasename] using codeset [encodingname] territory [validterritorycode] Note: The italicized text enclosed in brackets represents variables (which can be replaced with your own values). Also note that the database name cannot be more than eight letters. For details about DB2 database syntax, refer to the DB2 Information Center. For example: On Windows 2000, click Start > Run. Type db2cmd and press Enter. Then input the following command at the command prompt: db2 create db gbsrdb using codeset UTF-8 territory CN 2. Create a database for the User database with DB2 CLP. For example: At the command prompt, execute the following command: db2 create db gbuserdb using codeset UTF-8 territory CN 3. Configure the User database to add a new buffer pool, and set the page size to 16K.
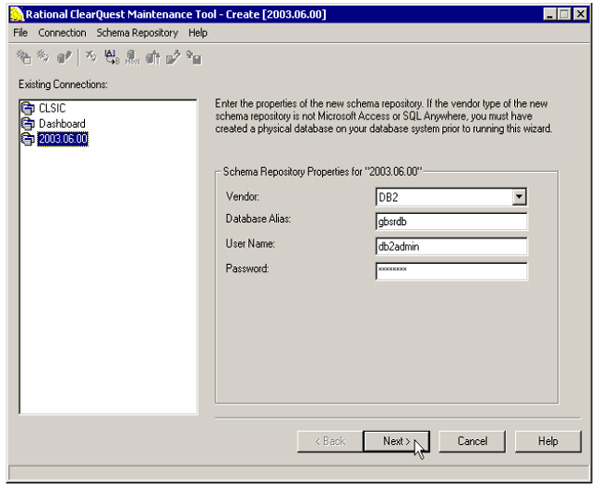
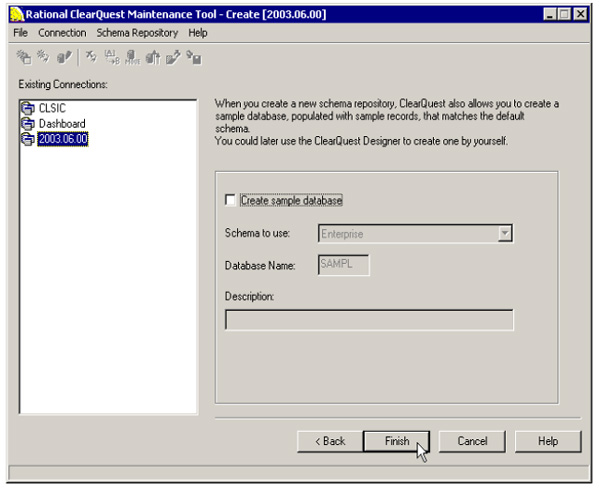
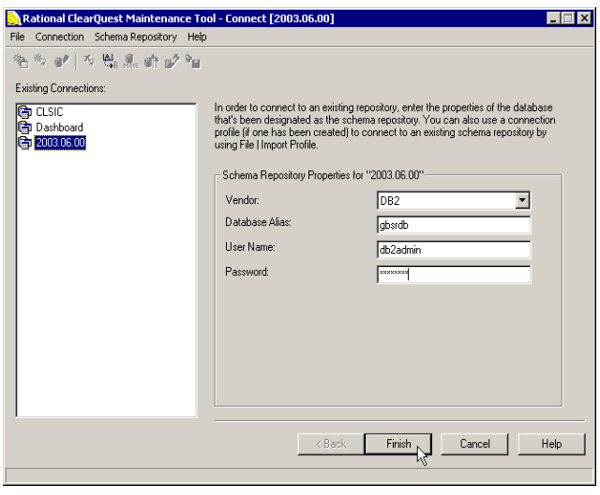
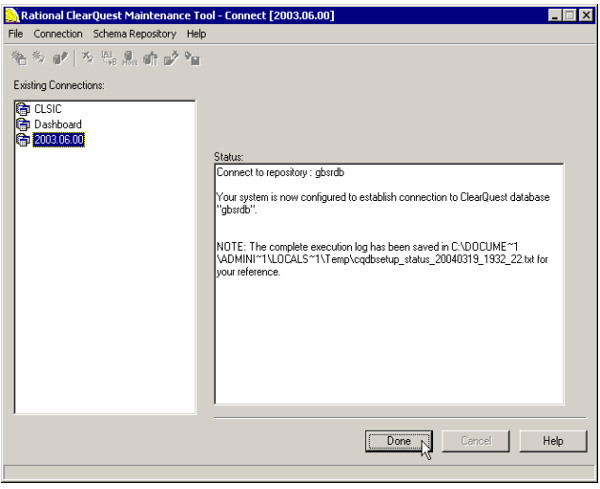
Note: You can also create these DB2 objects with the DB2 GUI tool DB2 Control Center, which provides some step-by-step wizards to help you complete these tasks. Create ClearQuest Schema Repository and User database on ClearQuest server 4. Create a schema repository with the ClearQuest Maintenance Tool.
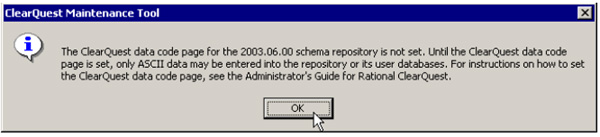
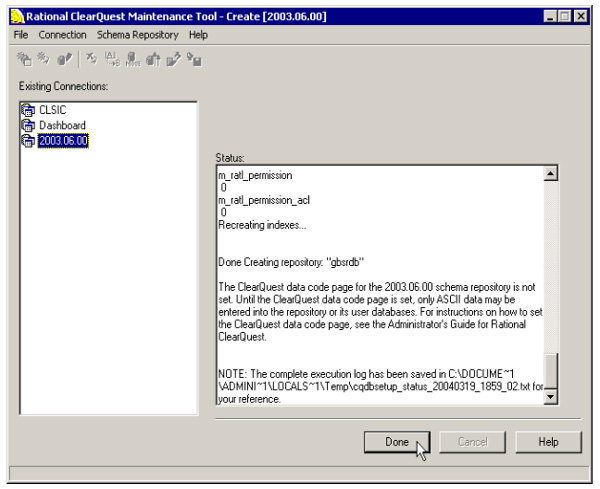
5. (Optional) As mentioned in Step 4.3, you can set the proper ClearQuest data code page by following these steps: Sample command:
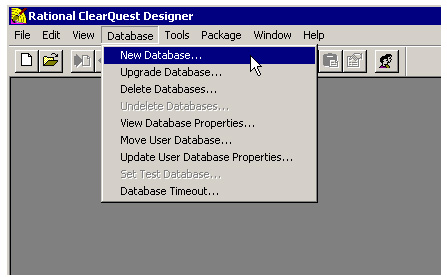
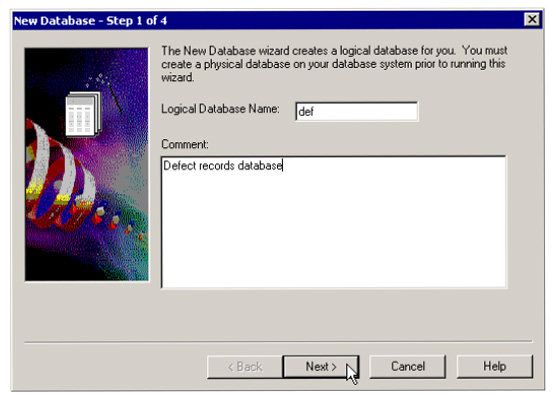
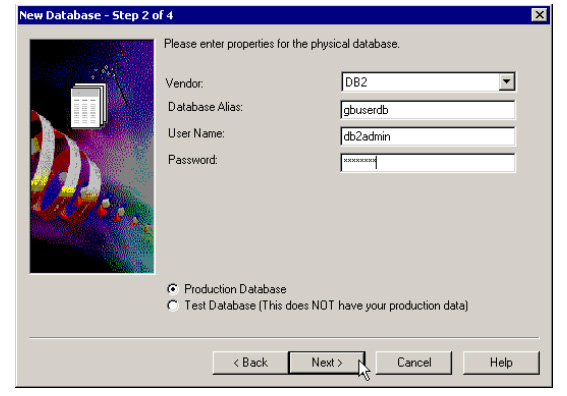
Note: for more detailed information about code page settings, refer to the Rational ClearQuest Administrator's Guide. 6. Create a User database with ClearQuest Designer.
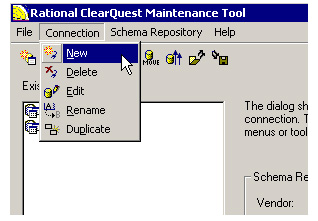
At this point, you have completed the ClearQuest server settings. You should be able to log on to ClearQuest from the server. To enable ClearQuest client access, you need to complete the following steps on your client machine: Configure ClearQuest client machine 7. Install DB2 client on your client machine. Next, catalog the Schema Repository database on the client machine and execute the following commands: db2 catalog tcpip node node1 remote [cqserver_name] For details on how to catalog a DB2 database on the client machine, refer to the DB2 Information Center. 8. Create a connection on the client machine with the ClearQuest Maintenance Tool.
9. Start to use ClearQuest. Congratulations! If you have successfully reached this point, you are ready to begin using ClearQuest. To log on, just enter your ClearQuest account and password, as shown below: Figure 15. Logging on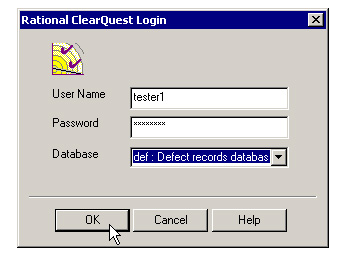
Once you've logged on, ClearQuest is ready for use. By combining ClearQuest with DB2 as your back-end RDBMS you now have a powerful, scalable change management solution. Figure 16. The ClearQuest workspace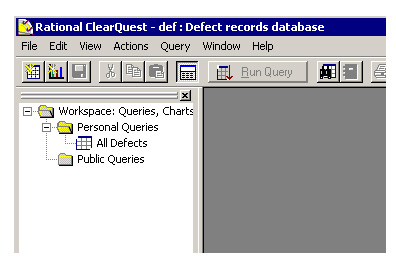 |


组织简介 | 联系我们 | Copyright 2002 ® UML软件工程组织 京ICP备10020922号 京公海网安备110108001071号 |