Introduction
One of the common tasks often performed
to photographic images is resizing. In general, scaling
an image by a certain percentage is quite simple. On the
other hand this might not produce an image that best meets
your needs. Often it is more appropriate to Crop and/or
Pad that image to achieve a standard height or width. Using
some simple techniques, there is an easy way to accomplish
these tasks programmatically using C# and GDI+.
In the first step we will load two photographs.
The first photograph has a landscape orientation while the
other is portrait. This will allow for a better demonstration
of how one can resize a photograph of varying sizes and
proportions.
string WorkingDirectory = @"C:\Tutorials\ImageResize";
Image imgPhotoVert = Image.FromFile(WorkingDirectory +
                                @"\imageresize_vert.jpg");
Image imgPhotoHoriz = Image.FromFile(WorkingDirectory +
                               @"\imageresize_horiz.jpg");
Image imgPhoto = null;
Example # 1 - Scale by
percent
In this example we will demonstrate a simple
method of scaling a photograph by a specified percentage.
Both the width and height will be scaled uniformly.
imgPhoto = ScaleByPercent(imgPhotoVert, 50);
imgPhoto.Save(WorkingDirectory +
    @"\images\imageresize_1.jpg", ImageFormat.Jpeg);
imgPhoto.Dispose();
....
static Image ScaleByPercent(Image imgPhoto, int Percent)
{
    float nPercent = ((float)Percent/100);

    int sourceWidth = imgPhoto.Width;
    int sourceHeight = imgPhoto.Height;
    int sourceX = 0;
    int sourceY = 0;

    int destX = 0;
    int destY = 0;
    int destWidth  = (int)(sourceWidth * nPercent);
    int destHeight = (int)(sourceHeight * nPercent);

    Bitmap bmPhoto = new Bitmap(destWidth, destHeight,
                             PixelFormat.Format24bppRgb);
    bmPhoto.SetResolution(imgPhoto.HorizontalResolution,
                            imgPhoto.VerticalResolution);

    Graphics grPhoto = Graphics.FromImage(bmPhoto);
    grPhoto.InterpolationMode = InterpolationMode.HighQualityBicubic;

    grPhoto.DrawImage(imgPhoto,
        new Rectangle(destX,destY,destWidth,destHeight),
        new Rectangle(sourceX,sourceY,sourceWidth,sourceHeight),
        GraphicsUnit.Pixel);

    grPhoto.Dispose();
    return bmPhoto;
}
Scaled to 50% of original size
In the above example we define a series
of variables that are used in the process of scaling the
image. sourceWidth, sourceHeight,
sourceX, sourceY
are used to build up a source rectangle structure. This
structure specifies the portion of the source image object
to draw. In our example we want the entire image, so our
source rectangle will have the following values: new
Rectangle(0,0,370,450).
destWidth, destHeight,
destX, destY
are used to build a destination rectangle structure. This
structure specifies the location and size of the drawn image.
The image is scaled to fit this rectangle. The destWidth
and destHeight are calculated by
multiplying the sourceWidth and sourceHeight
by the percentage we want it scaled by. The result is a
Bitmap with the new width and height
and a destination rectangle with the following values: new
Rectangle(0,0,185,225).
Example #2 - Scale to a
fixed size
A very common task used when creating images
for a web site is to resize those images to have a fixed
width and height. Often when displaying a list of data,
it is beneficial to have any columns that contain images
occupy identical dimensions. Since images will have varying
orientations it will be necessary to fit either the width
or height, then pad the opposite dimension with filler.
imgPhoto = FixedSize(imgPhotoVert, 300, 300);
imgPhoto.Save(WorkingDirectory +
    @"\images\imageresize_3.jpg", ImageFormat.Jpeg);
imgPhoto.Dispose();
....
static Image FixedSize(Image imgPhoto, int Width, int Height)
{
    int sourceWidth = imgPhoto.Width;
    int sourceHeight = imgPhoto.Height;
    int sourceX = 0;
    int sourceY = 0;
    int destX = 0;
    int destY = 0;

    float nPercent = 0;
    float nPercentW = 0;
    float nPercentH = 0;

    nPercentW = ((float)Width/(float)sourceWidth);
    nPercentH = ((float)Height/(float)sourceHeight);
    if(nPercentH < nPercentW)
    {
        nPercent = nPercentH;
        destX = System.Convert.ToInt16((Width -
                      (sourceWidth * nPercent))/2);
    }
    else
    {
        nPercent = nPercentW;
        destY = System.Convert.ToInt16((Height -
                      (sourceHeight * nPercent))/2);
    }

    int destWidth  = (int)(sourceWidth * nPercent);
    int destHeight = (int)(sourceHeight * nPercent);

    Bitmap bmPhoto = new Bitmap(Width, Height,
                      PixelFormat.Format24bppRgb);
    bmPhoto.SetResolution(imgPhoto.HorizontalResolution,
                     imgPhoto.VerticalResolution);

    Graphics grPhoto = Graphics.FromImage(bmPhoto);
    grPhoto.Clear(Color.Red);
    grPhoto.InterpolationMode =
            InterpolationMode.HighQualityBicubic;

    grPhoto.DrawImage(imgPhoto,
        new Rectangle(destX,destY,destWidth,destHeight),
        new Rectangle(sourceX,sourceY,sourceWidth,sourceHeight),
        GraphicsUnit.Pixel);

    grPhoto.Dispose();
    return bmPhoto;
}
In the above example it is our desire to
create an image with a width of 300 and a height of 300.
The first step in accomplishing this is to determine the
smallest possible percent that we can shrink this image,
while making sure to fill the maximum height and width.
nPercentW = ((float)Width/(float)sourceWidth);
nPercentH = ((float)Height/(float)sourceHeight);
if(nPercentH < nPercentW)
{
    nPercent = nPercentH;
    destX = (int)((Width - (sourceWidth * nPercent))/2);
}
else
{
    nPercent = nPercentW;
    destY = (int)((Height - (sourceHeight * nPercent))/2);
}
To do this we will calculate both a height
percentage and a width percentage and check which is smaller.
nPercentW =.8108 while nPercentH=.6666.
Choosing the smaller percentage guarantees that none of
the image will be cropped. Since height is the smaller reduction,
this will be our maximum percent to scale the original image.
When this percent is applied to the width,
we end up with a width equal to 247. Our desired destWidth
was 300, so we will need to pad each side of the image with
27 additional pixels. This padding is accomplished by setting
the destX=27. This will shift the
newly scaled image to the right 27 pixels.
Using the desired nPercent
and destX, we can build up the appropriate
destination Rectangle and draw the
new image.
Example #3 - Scale with
cropping
The last resizing technique we will discuss
is the process of cropping an image. This technique follows
a similar methodology as the previous fixed size example
with a few exceptions.
imgPhoto = Crop(imgPhotoVert, 300, 300, AnchorPosition.Bottom);
imgPhoto.Save(WorkingDirectory +
       @"\images\imageresize_4.jpg", ImageFormat.Jpeg);
imgPhoto.Dispose();

....
static Image Crop(Image imgPhoto, int Width,
                    int Height, AnchorPosition Anchor)
{
    int sourceWidth = imgPhoto.Width;
    int sourceHeight = imgPhoto.Height;
    int sourceX = 0;
    int sourceY = 0;
    int destX = 0;
    int destY = 0;

    float nPercent = 0;
    float nPercentW = 0;
    float nPercentH = 0;

    nPercentW = ((float)Width/(float)sourceWidth);
    nPercentH = ((float)Height/(float)sourceHeight);

    if(nPercentH < nPercentW)
    {
        nPercent = nPercentW;
        switch(Anchor)
        {
            case AnchorPosition.Top:
                destY = 0;
                break;
            case AnchorPosition.Bottom:
                destY = (int)
                    (Height - (sourceHeight * nPercent));
                    break;
            default:
                destY = (int)
                    ((Height - (sourceHeight * nPercent))/2);
                break;
        }
    }
    else
    {
        nPercent = nPercentH;
        switch(Anchor)
        {
            case AnchorPosition.Left:
                destX = 0;
                break;
            case AnchorPosition.Right:
                destX = (int)
                  (Width - (sourceWidth * nPercent));
                break;
            default:
                destX = (int)
                  ((Width - (sourceWidth * nPercent))/2);
                break;
        }
    }

    int destWidth  = (int)(sourceWidth * nPercent);
    int destHeight = (int)(sourceHeight * nPercent);

    Bitmap bmPhoto = new Bitmap(Width,
            Height, PixelFormat.Format24bppRgb);
    bmPhoto.SetResolution(imgPhoto.HorizontalResolution,
            imgPhoto.VerticalResolution);

    Graphics grPhoto = Graphics.FromImage(bmPhoto);
    grPhoto.InterpolationMode =
            InterpolationMode.HighQualityBicubic;

    grPhoto.DrawImage(imgPhoto,
        new Rectangle(destX,destY,destWidth,destHeight),
        new Rectangle(sourceX,sourceY,sourceWidth,sourceHeight),
        GraphicsUnit.Pixel);

    grPhoto.Dispose();
    return bmPhoto;
}
When cropping an image you have 5 choices
as to how one decides, what part of the image to crop. We
refer to this as how one anchors the image. Top, bottom,
and center are appropriate when cropping an image's height
where as left, right and center are appropriate for width.
(There are more, but for the purpose of this example we
will focus in these 5.)
Similar to example #2, the first thing
we need to do is determine a height percentage and a width
percentage that gets us to the desired dimensions. Since
our desired dimensions are 300x300, we end up with the same
percentages as in the previous example. Once again we will
compare the two, but this time we will choose the larger
of the two percentages. (nPercentW
= .8108)
if(nPercentH < nPercentW)
{
    nPercent = nPercentW;
    switch(Anchor)
    {
        case AnchorPosition.Top:
 destY = 0;
 break;
        case AnchorPosition.Bottom:
 destY = (int)(Height - (sourceHeight * nPercent));
 break;
        default:
 destY = (int)((Height - (sourceHeight * nPercent))/2);
 break;
    }
}
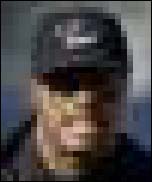
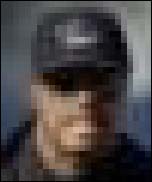
Image anchored top

Image anchored center
Image anchored bottom
By using 3 different destY
values, we can achieve the 3 different ways to crop the
image. If our source image would have had a landscape orientation,
then left, right and center would have been appropriate
and destX would have been used to
achieve a crop of the image's width.
One last thing...
In all of the examples, we called both
the SetResolution and InterpolationMode
prior to drawImage. SetResolution
does just as the name implies. In these examples, we carry
over the original image's resolution by setting this property
equal to imgPhoto.HorizontalResolution,
imgPhoto.VerticalResolution.
bmPhoto.SetResolution(imgPhoto.HorizontalResolution,
                                 imgPhoto.VerticalResolution);

Graphics grPhoto = Graphics.FromImage(bmPhoto);
grPhoto.InterpolationMode = InterpolationMode.HighQualityBicubic;
Interpolation refers to how data is interpolated
between endpoints. In its simplest form, to interpolate
is to estimate a missing value by taking an average of known
values at neighboring points. Below is the graphical representation
of three different approaches to interpolation.
In general the bicubic interpolation is
used when more accuracy is desired than the bilinear interpolation.
Bicubic interpolation
Bilinear interpolation

Nearest-neighbor interpolation
That's it! Compile the project, run it,
and see what happens! The code is fairly straightforward.
If it all makes sense, then these resizing techniques can
be used to scale virtually any image.
|