| 就在几个月前的一个项目中,我决心按照敏捷开发的实践,为项目组引入一个测试覆盖率工具。首先考虑的当然是大名鼎鼎的Clover,Clover功能强劲,理应是测试覆盖率的首选工具。但Clover用于商业开发是要收费的,况且我喜欢开源、免费的东西。经过了一番测试和比较,我选择了EMMA
Code Coverage。就像一篇评测覆盖率工具的Blog所言,它是开源工具的首选。
在讨论EMMA的使用之前,我首先简要介绍几个相关的概念。
测试覆盖率(Code Coverage)
测试覆盖率,简单的说,就是评价测试活动覆盖产品代码的指标。测试的目的,是确认产品代码按照预期一样工作,也可以看作是产品代码工作方式的说明文档。进一步考虑,测试覆盖率可以看作是产品代码质量的间接指标--之所以说是间接指标,因为测试覆盖率评价的是测试代码的质量,并不是产品代码的质量。
代码覆盖率是一种白盒测试,因为测试覆盖率是评价产品代码类内部的指标,而不是评价系统接口或规约。测试覆盖率尤其用于评价测试代码是否已经覆盖了产品代码所有的路径。
衡量测试覆盖率的指标很多,常用的指标有:
Statement coverage,也称作Line coverage,用于评价测试的代码语句覆盖率。
Basic block coverage,是Statement coverage的一个变种,它把没有一个分支的代码区域作为一个计量单位,而不是简单的代码行,用于一个if-else分支代码行数远远大于另一个的情况,在这种情况下,statement
coverage指标并不适用。
Decision coverage(也称作Branch coverage),用于评价代码分支地测试覆盖率。
Path coverage,和Decision coverage相似,用于评价代码从开始到结束所有路径的测试覆盖率。
Function coverage,用于评价代码方法的测试覆盖率。
EMMA目前支持四种Coverage类型:class、method、line和basic block。
测试覆盖率的实现方式
实现测试服务覆盖率的技术通常分为两种:
1、Instrumentation
Instrumentation技术在产品代码的关键位置插入统计代码。事实上,Instrumentation技术可以分为两种方式:Class
Instrumentation和Source Instrumentation。前者把统计代码插入编译好的.class文件,而后者则把统计代码插入源代码并编译成新的.class文件。大多数测试覆盖率工具采用这两种Instrumentation技术。
2、Custom JVM
另一种方式是在JVM中把统计代码插入.class。测试覆盖率分析可以在JVM执行测试代码的过程中完成。
测试覆盖率工具的典型特性
1、和Ant集成
2、多种报告输出格式
3、源代码链接
4、覆盖率历史报告
EMMA的特点
Instrumentatiton方式:EMMA使用两种模式来实现覆盖率的统计,它称作“offline”和“on-the-fly”。EMMA使用Instrumentation
.class文件的方式。EMMA通过byte instrumentation生成.class文件的增强版本,加入了统计测试覆盖率的代码Hook。对于“offline”模式,它从硬盘读入.class文件,然后输出经过Instrumented的增强版本;对于“on-the-fly”模式,这些操作发生在JVM内部(即增强版本的.class文件不写入硬盘)。前者是通用的模式,而后者用于简单的Java应用程序。
支持的覆盖率指标:EMMA支持class,method,line和basic block coverage指标。
优越的性能和可伸缩性。
Java平台支持:EMMA支持Java 1.2或更高版本的JVM,不依赖于任何第三方类库。
CPL License。
使用EMMA:命令行方式
安装EMMA的jar文件到类路径-最简单的方法是,把emma.jar复制到/lib/ext/。注意,不要复制emma_ant.jar,否则使用Ant脚本会出错。
on-the-fly模式:使用emmarun-使用-g选项编程java源代码,javac -g -d out ,然后执行java
emmarun -cp out 。本方法把instrumentation和执行过程合而为一。
offline模式:分开instrumentation过程和执行过程-首先使用-g选项编译java源代码,javac
-g -d out ;然后是instrumentation,java emma instr -d outinstr
-ip out,注意,经过instrumentation的class目标目录是outinstr;最后是执行过程,java
-cp outinstr;out ,注意,把经过instrumentation的类路径放在前面,并在后面加上原来的类路径,因为instr命令没有处理properties文件和interface,这些都是执行过程需要的。
使用EMMA:Ant
设置instrumentation属性
<property
name="coverage.dir" value="${basedir}/coverage"
/>
<property name="out.instr.dir" value="${basedir}/outinstr"
/>
<property name="emma.enabled" value="true"
/>
<property name="javac.debug" value="on"
/>
<!-- path element used by EMMA taskdef below: -->
<path id="emma.lib" >
<pathelement location="${libs}/emma.jar"
/>
<pathelement location="${libs}/emma_ant.jar"
/>
</path>
在Ant脚本中加入EMMA task
<!-- this loads <emma> and <emmajava>
custom tasks: -->
<taskdef resource="emma_ant.properties"
classpathref="emma.lib" />
在编译Task中打开debug选项
<target name="compile">
<mkdir dir="${classes.main}" />
<javac srcdir="${src.main}" destdir="${classes.main}"
debug="${javac.debug}">
<classpath refid="classpath.lib" />
</javac>
<copy todir="${classes.main}">
<fileset dir="${src.main}" includes="**/*.xml,
**/*.vm" />
</copy>
</target>
instrumentation task
<target name="instrument" depends="compile">
<mkdir dir="${out.instr.dir}" />
<mkdir dir="${coverage.dir}" />
<emma enabled="${emma.enabled}" >
<instr instrpathref="classpath.main"
destdir="${out.instr.dir}"
metadatafile="${coverage.dir}/metadata.emma"
merge="true"
>
<filter excludes="com.talent.fw.formula.test.*Test*,com.talent.fw.esb.*Test*,com.talent.fw.message.test.*,com.
talent.fw.entityengine.*Test*,com.talent.fw.integration.*Test*,com.talent.fw.security.impl.*Test*,testdomain.*"
/>
</instr>
</emma>
</target>
JUnit测试
<target name="test" depends="compile,
instrument">
<mkdir dir="${reports.junit.data}" />
<mkdir dir="${classes.main}/maps" />
<mkdir dir="${classes.main}/scripts"
/>
<copy todir="${classes.main}/maps">
<fileset dir="${src.main}/maps" />
</copy>
<copy todir="${classes.main}/scripts">
<fileset dir="${src.main}/scripts" />
</copy>
<copy todir="${classes.main}">
<fileset dir="${src.main}" includes="*.xml,
*.properties, **/*.vm, **/*.dtd" />
</copy>
<rmic classname="com.talent.fw.message.test.RMITestServer"
base="${classes.main}"/>
<junit printsummary="yes" haltonfailure="no"
failureproperty="tests.failed">
<classpath location="${out.instr.dir}"
/>
<classpath location="${classes.main}"
/>
<classpath location="${src.main}" />
<classpath refid="classpath.lib" />
<jvmarg value="-Demma.coverage.out.file=${coverage.dir}/coverage.emma"
/>
<jvmarg value="-Demma.coverage.out.merge=true"
/>
<formatter type="xml" />
<batchtest fork="yes" todir="${reports.junit.data}"
failureproperty="tests.failed">
<fileset dir="${classes.main}">
<include name="**/*Test.class" />
<exclude name="**/AllTests.class" />
<exclude name="**/Base*Test.class" />
</fileset>
</batchtest>
</junit>
</target>
生成报告并复制到Tomcat的发布目录下
<target name="coverage.report" depends="instrument">
<!-- if enabled, generate coverage report(s): -->
<emma enabled="${emma.enabled}" >
<report sourcepath="${src.main}"
sort="+block,+name,+method,+class"
metrics="method:70,block:80,line:80,class:100"
>
<fileset dir="${coverage.dir}" >
<include name="*.emma" />
</fileset>
<!-- <xml outfile="${coverage.dir}/coverage.xml"
depth="package" /> -->
<html outfile="${coverage.dir}/coverage.html"
depth="method"
columns="name,class,method,block,line"
/>
</report>
</emma>
<mkdir dir="${coverage.publish.dir}"
/>
<copy todir="${coverage.publish.dir}">
<fileset dir="${coverage.dir}">
<include name="**/*.html" />
</fileset>
</copy>
</target>
|
和CruiseControl集成
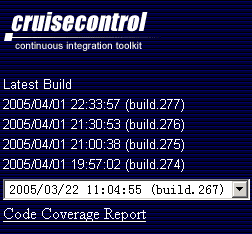
最简单的集成方式是在cruisecontrol的navigation.jsp文件下方加入EMMA测试覆盖率报告的超链接。如下图:
进一步的集成方式是,在生成HTML报告的同时,生成XML格式的报告,并为XML格式报告编写XSL文件,并加入到CruiseControl的buildresults.jsp文件中。
|